Years ago, I renovated my bathroom after living in my house for almost 15 years. It was a hall bath for the use of guests. I had very few guests and it mainly went unused. I upgraded everything but the tub. There were still very few guests. That was such a waste so I began using it as my personal spa. It was my sanctuary.
Faucet Upgrade
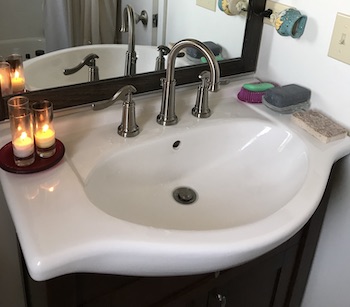
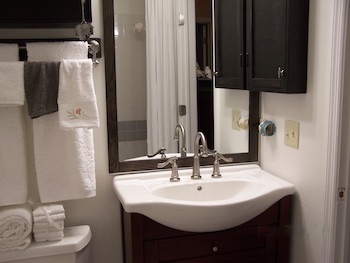
The old sink and vanity were the original contractor grade items. The faucet would leak from time to time, especially the hot one. I’d replace the rubber washers and go about my business. They served their purpose.
I discovered that new sink sets with ceramic cartridges do not require washers. Rubber washers and o-rings are cheaper but worrisome. Most homeowners interact with them on a continuous basis. Ceramic cartridges are virtually maintenance free. That’s what I chose.
The new faucets worked as promised. I like having nice things.
After another decade, the faucet started to leak. It started as an occasional drip that stopped when I forcibly pushed back the handle. I knew this would not last very long. Soon, it leaked continuously for a few weeks. No more tweaking. The handles can only be pushed so far.
As we all know at some point in our lives, it starts with a dripping faucet.
Replacing washers under the faucet handles was not an option. There were no washers. That was the attraction when I purchased the sink set. It is still an attraction.
A fun fact about me
I am not a cold weather person! If possible, I almost never do any water related projects including repairs of faucets in the winter or when the weather is cold. I anticipate problems and go out of my way to do those things in warmer weather. I do not want to be under or inside my house if cold water starts gushing all over the place.
In an emergency, yes, I attend to what must be done. Preventive maintenance and knowing my home systems help me reduce surprises.
And in the karma of life, if something does go wrong, nine times out of ten, the culprit is not far. Little hints occurred along the way that I ignored. I admit that I did not want to deal with them at the time. So when something does happen (laughing to myself), I acknowledge that it is no surprise at all!
A Little Defensive Repair
Only the hot water faucet leaked, but for the sake of symmetry, I chose to replace the cold water as well.
I decided to do the repair, myself. After all, I personally installed the new vanity, sink, and faucet during the upgrade years ago.
Remember, this is one of the many tasks that I did when I was growing up. Throughout my life I have done this in a number of scenarios in rustic country houses, one hundred year old homes and even new houses.
Faucet replacement
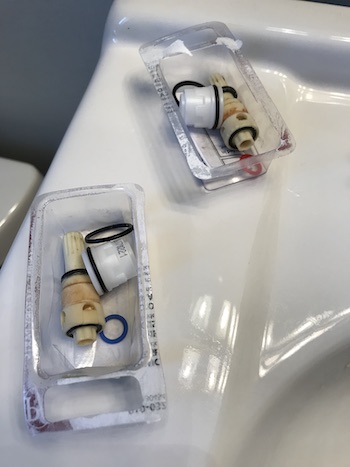
I found the replacement ceramic cartridges. Of course, the exact replacement was no longer to be had, but “new” cartridges were available that would fit the faucet.
- Inventory item: Left-hand (hot) and right-hand (cold) threaded 1/4 turn ceramic lavatory valves.
- Instructions: Installation instructions should be read, studied, and filed for future reference. All precautions should be heeded. Refer to them often during the course of the repair, if needed.
- Tools: Adjustable wrench, flat and phillips screwdrivers, hammer.
- Safety first: Turn off the water supply. And remember the shop poem.
- Aesthetics: Take care not to scratch the sink, spout, and faucet finishes!
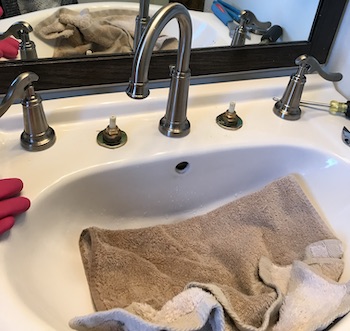
Foremost precaution – the most important precaution – is to protect the sink. It does not matter if it is porcelain or stainless steel. A large towel is laid in the sink to cushion or provide protection from a dropped part or tool that could crack or scratch the sink. If it does get cracked, replace it. It cannot be salvaged.
Contrary to popular belief, a hairline crack in a porcelain sink will eventually get bigger due to changes in water temperature, weight of the water in the sink, and bumps inside and outside the house. And it may turn into a regrettably inconvenient water catastrophe!
The towel also absorbs water that may leak when faucet parts are loosened and removed.
The gooseneck spout does not have to be removed (usually) since it is not impacted by the repair.
Don’t Throw Anything Away
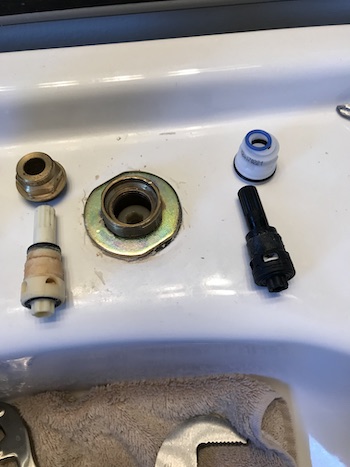
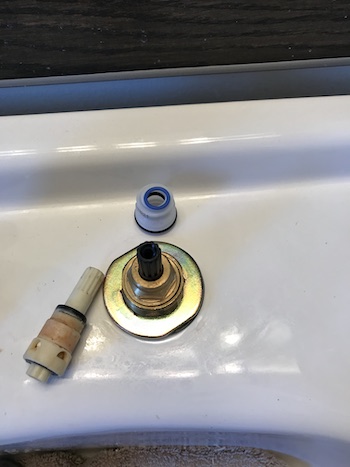
I carefully removed the faucet covers/handles and set them aside. Then I unscrewed the retaining nut, lifted the old cartridges and compared them to the new ones.
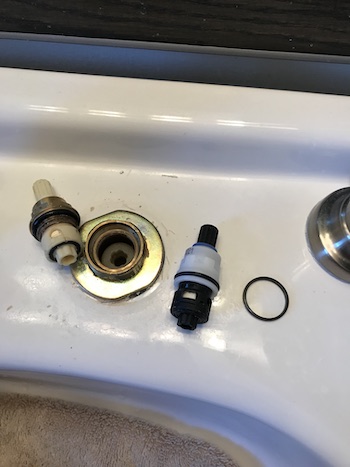
Then, any attached rings or washers are configured so that everything fits and looks right. The new setup needs to fit under the old faucet covers. Before discarding any extraneous rings or even the old cartridge, I made sure the reassembled faucet works as it should. I do not want to dig through the garbage for a crucial ring or any other loose part.
Old parts should not be unnecessarily mangled by tools, notably the wrench, during removal. An old ring or screw may have to be recycled and fitted on the new installation in order to make things work. The metal retaining nut tightens or fastens the new cartridge in the sink deck. It is part of the sink.
Despite your best efforts, an installation may not go as planned. You may find yourself reassembling the faucet with all the old parts while you go back to the drawing board!
Avoid the letdown and listen to the voice of experience. Do not throw anything out just yet!
the reassembly does not go according to plan!
A Mindful Operation
The key here is to pay attention and make every move count.
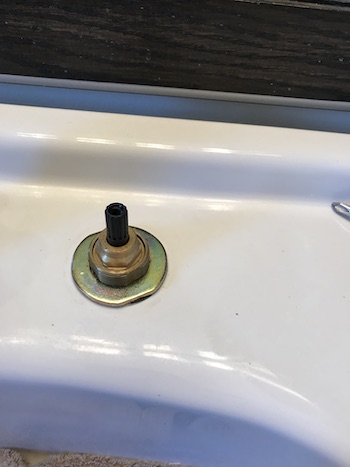
Next, I inserted the new cartridge through the metal washer, laid on the retaining nut and tightened it.
This is the perfect time for a good cleaning of the sink deck.
I put the faucet covers back over the new cartridges. Then, I dialed in the handles to rest perpendicular to the spout when in the “off” position. This allows a full quarter turn of the handles when they are turned on and controlling the water flow.
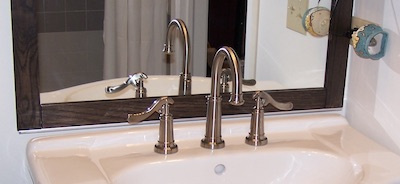
Finally, turn on the water supply and check for leaks at and under the sink.
Testing the Faucet
Once more, the spa is ready.
Baadaye
Shirley J ❤️
__________
Reminder: This post is based on my own experience. If you get inspired to do this for yourself, know these things:
- your personal capability, that is, what you can or cannot do,
- your local building codes,
- when to call in a professional.
Again, don’t take on any project like this if you truly do not know what you are doing.
Sj