Recollections of my early projects are just that. They were done by hook or crook, without “good tools” or simply, by my bootstraps. Some, like the installation of an electrical box, were completed years ago when I had no inclination to record my work in any detailed way.
These stories are meant only to entertain. They may provide an idea, a solution, a lot of oh-oh’s, a few oh no’s, or a nod of agreement.
I am always doing what I cannot do yet, in order to learn how to do it.
– Vincent Van Gogh
Story #2: A little electrical work
A few years ago, I renovated a powder room. It was not a big job in my mind. A little paint, a new vanity and sink, racks for towels and toilet paper were upgraded. One other change was replacement of the old Hollywood vanity lights.

At the time, I thought that calling an electrician to replace the lights with a modern fixture would help me get my work done fast! I found that a shortage of electricians existed and there would be a long wait for one.
What do you do when you need a little work done and there is no one around to do it? This was a problem that needed study. I found that principles of electricity are based on mathematics. Will I really have to use math? I am reasonably comfortable with it. Let’s see how comfortable.
Reminder:
This post is based on my own experience. If you get inspired to do this for yourself, know these things:
- your personal capability, that is, what you can or cannot do,
- your local building codes,
- when to call in a professional.
Again, don’t take on any project like this if you truly do not know what you are doing.
Let’s see how it worked out.
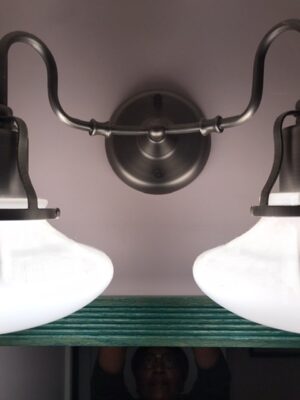
Lights off
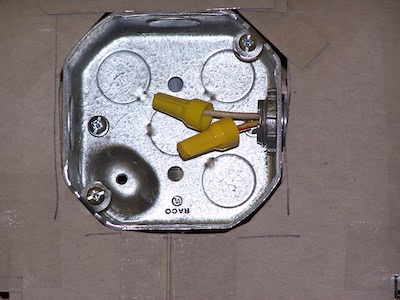
This type of fixture is relatively easy to dismantle and remove from the wall. There are the usual suspects – the hot and cold wires, and a ground wire.
If the replacement fixture is the same, just hook up the wires by matching the colors. Make sure they are not twisted. The lock nuts should be secure but not so tight that pieces of the wire break off inside.
For this project, I replaced the old lights with a new fixture that required an electrical box to hold the wiring and the fixture on the wall.
Note: The old Hollywood strip functioned as a self-contained electrical box. Loss of the old light takes away the box and any support for a new one.
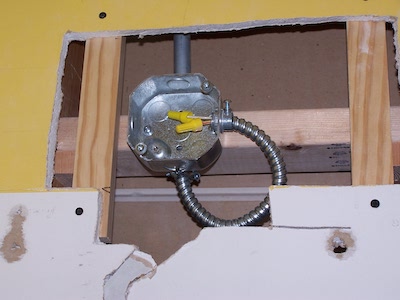
Installing the electrical box
The old fixture is off the wall. To get access to the wiring some of the drywall had to be removed. Slowly, I used a drywall saw to cut away enough material to allow me to safely work in the space. The tail at the bottom of the cut resulted from an odd maneuver to flip out all of the wiring.

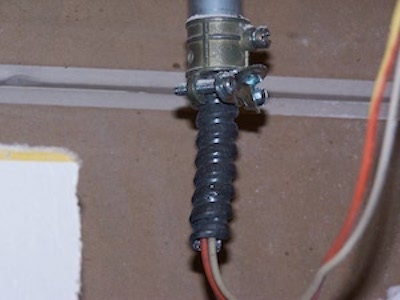
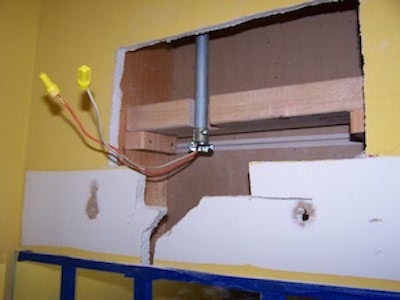
The old conduit was a bit short to use for the electrical box. I removed and replaced it with a longer length of new conduit that would be attached to the box.
Backer strips
I added a short length of wood between the wall studs for attaching the metal electrical box. A notch cut accommodated the straight conduit. Short vertical backer strips were used to anchor the drywall.

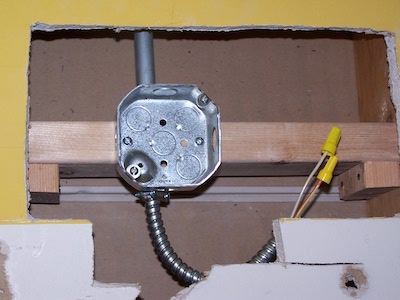
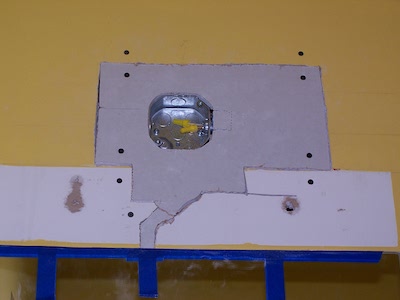
Staging the electrical box
Now, a piece of drywall had to be fitted to the hole. I used cardboard to create a template.
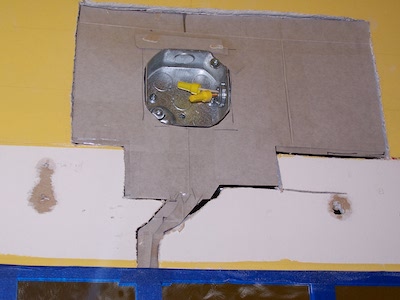
See the cut out for the electrical box.
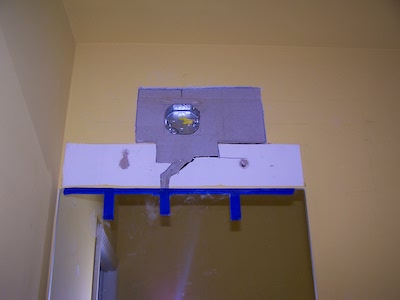
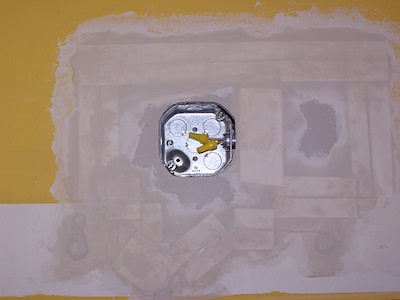
Here is the drywall patch copied from the template and installed in the wall.
Finishing the drywall
Now comes the taping and skimming of the patch.
After the first skim coat dries, it is sanded lightly. A second skim coat was applied and sanded. Finally, a finish sanding was done.
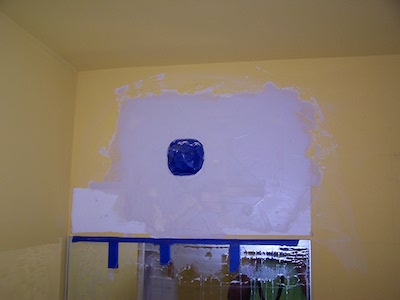
Here the room is painted with the new color. It is ready for installation of the new fixture.
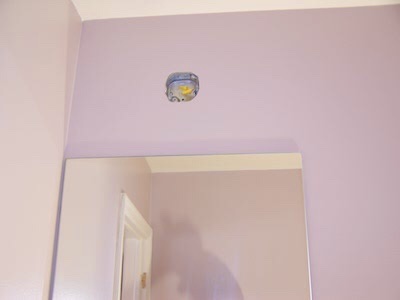
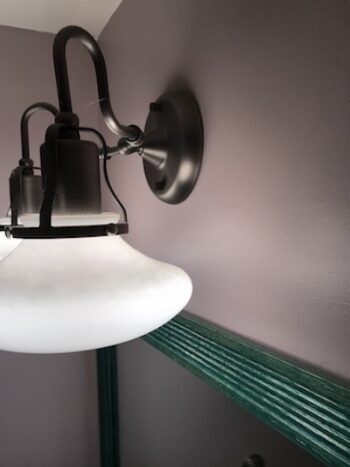
Lights on
Now the new fixture is attached to the wall. It was installed according to the manufacturer’s instructions.
Power on… safely.
It’s adding up.
Simple.
___
Next time: Story #3: the powder room renovation continues.
Baadaye

♥️
Remember: If you are going to make any project, be mindful and be safe.