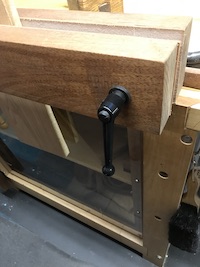
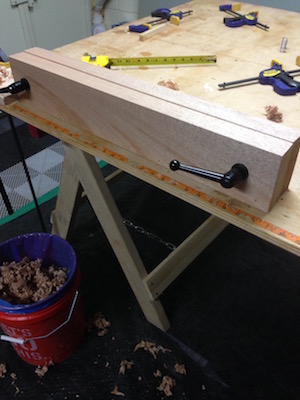
Now that I’ve claimed a seat on the dovetailing bandwagon, I have to set up my practice. I need to get a grip. A moxon vise will help satisfy that requirement.
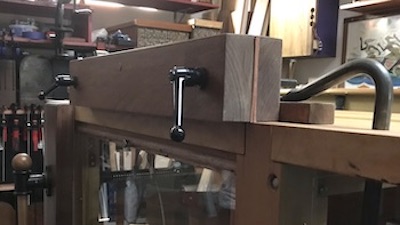
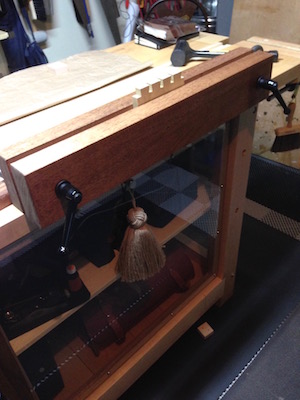
The vise, a double-jawed clamp, is temporarily affixed to the bench top with holdfasts while working. The front jaw of the vise is projected beyond the top edge of the bench. This allows the dovetailing stock to hang in front of the bench edge while inserted in the vise.
The actual vice elevates the height of the dovetail working surface. The work is closer to the eye, resulting in better precision. You don’t have to bend over your work so there’s less strain on the neck and back.
Echoes of Moxon
This modern iteration of the vise was interpreted from one written about by Joseph Moxon. He was an English printer, hydrographer, and lexicographer.
Moxon’s late 17th century work, Mechanick Exercises, or, The Doctrine of Handy-works, was a treatise on the practices and philosophies in the ancient workshop. It provided a comprehensive look into labor conditions during his time.
Mechanick Exercises‘ elaborate illustrations and narratives documented the “manual arts”. This collection included instructions in metalworking, printing, and woodworking including carpentry and joinery.
Today’s renewed interest in Moxon has been invigorated alongside the revival of the roubo bench.
Way of the vise
I found this to be the perfect opportunity to make this shop aid and unlock the effect it has on woodworking today.
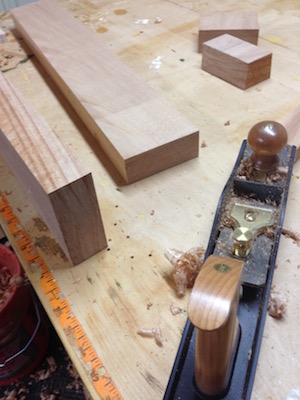
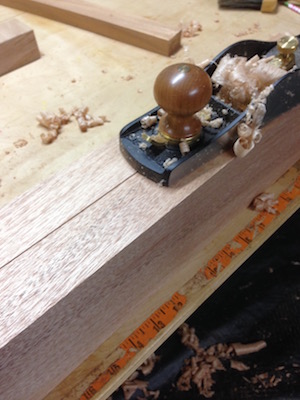
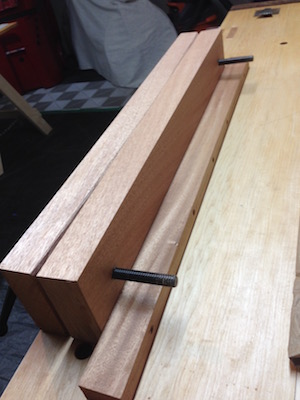
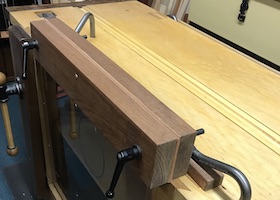
I had a mahogany blank on hand that was close to the width, thickness and length needed for the vise. From the blank, I cut and planed two vice jaws. Nominal measurements are 5″ x 2″ x 27″ for each piece.
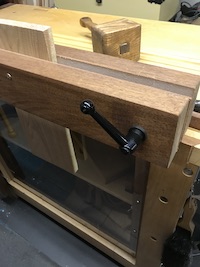
The hardware kit included metal nuts, washers and acme screw handles with an innovative adjustment feature. The handles ratchet out of the way no matter where the initial tightening of the vise ends.
This particular hardware (which I purchased) is well thought out. Also, it was reasonably priced.
Moxon vise interpretations
Like the roubo bench, there are many practical variations of the vise/hardware in style and in price. These range from shop made vises with tapped wood screw handles to heirloom quality “production” vises with hand wheels riding hefty acme screws.
Taking into account my vise’s screw handles, I can fit and hold a 21″ wood panel between the acme screws in the vise jaws. So that I could secure the vise to my bench, I attached a back cleat for holdfasts.
Mistakes were made
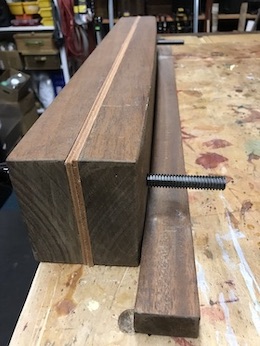
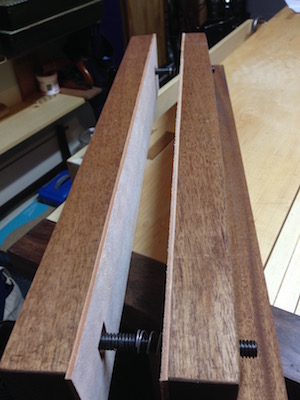
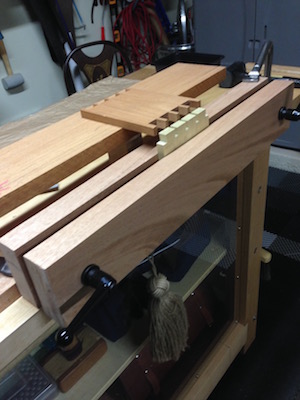
Before I go further, I have to talk about the curvature of the face of the front jaw of my vise. There is none.
Many woodworking discussions have been made about a convex curve on the face of the inner jaw. This would enable the vise to more securely grip the dovetail piece. I planed the jaw face to get that curve.
It looked like it would work. However, I realized that I made a mistake by planing the curve on the outer face, rather than the inner face, of the jaw. As a result, the intended grain direction was lost.
My plan was for the grain on both jaws to run in the same direction. Better for planing, sanding, and finishing, perhaps.
By and by, to correct my mistake, I left the rear jaw as modified, thus losing the “advantage” of the curve. Since the vise wasn’t near being finished, I never tested it. Luckily, this left the front jaw square for identifying registration faces when needed.
It was a disappointment, but not a big loss. It works.
Back to the program
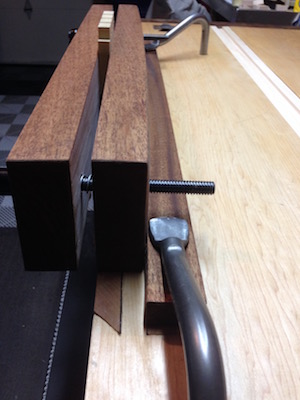
Through the bottom of each jaw, a mortise was chopped for capturing the metal nuts. Holes for the acme screw handles must be made, now, through the sides of the jaws. These openings have to be perpendicular to each other.
The acme screw handles will feed through the metal nut threads in the mortised cavity and vise jaws. Therefore, all measuring and marking must be as precise as possible.
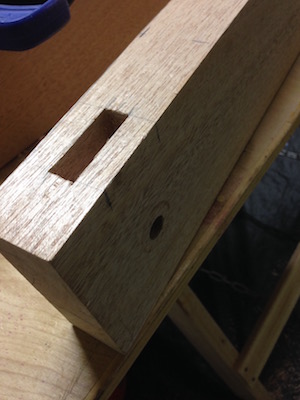

It’s a matter of getting it in there and making it good enough for the next step: the test fit.
It’s moving along.
Dressing up my moxon vise
The vise is only a tool, I know, but I wanted it to look nice.
A moxon vise with a leather lining on the jaws better grips the wood as its worked on. I used 7 ounce vegetable tan leather for this purpose.
With the lining, the workpiece is cushioned and protected against the crushing pressure of the vise action. Others have used cork or simply left the wood bare.
This is just another personalization choice for the vise.
Springs on the acme screws provide better, albeit mechanical, response and reduces the effort used to open the jaws when inserting and repositioning a workpiece. My vise jaws open to a maximum of 2-1/4″ maybe a little more for tweaking.
I applied a shellac finish to the vise. That is all for this project.
Oh yes, the final, actual dimensions are 4.25″x 1.75″ x 26.5″ for each jaw.
Dovetail (verb) only when you want to
The emphasis on cutting dovetails creates a lot of pressure on woodworkers. Yes, they look nice and could be seen as a mark of competence or even expertise. However, every project is not a candidate for such treatment.
As the creator of anything in your shop or workspace, you DO get to decide how your creation comes to life. If you deem that dovetails would look nice or are appropriate for that box, cabinet, or furniture piece, make them. And if dovetails are “not today” in your mind, pick something else… without reservation or regret.
There are hundreds of variations in woodworking joinery that are tried and true, sensible applications for any project.
No one is looking over your shoulder. Woodworking proctors do not exist. This is not a test.
Learning how to do something through experimentation and having fun is freedom. All of these are my companions in my wood shop. Invite them to your space once in a while.
Shop “poem” for the day
Whenever you make anything –
modify or conform choice of wood,
measurements, tools and techniques, fittings, and finish,
according to your own skills,
preferences, needs, space, and circumstances.
I am thinking of a project…
Baadaye!
💛S

2 thoughts on “● Moxon Vise: the Fourth Hand”
Very informative. Thanks for sharing, Shirley!
You are most welcome Natalie. I appreciate your interest.
Comments are closed.