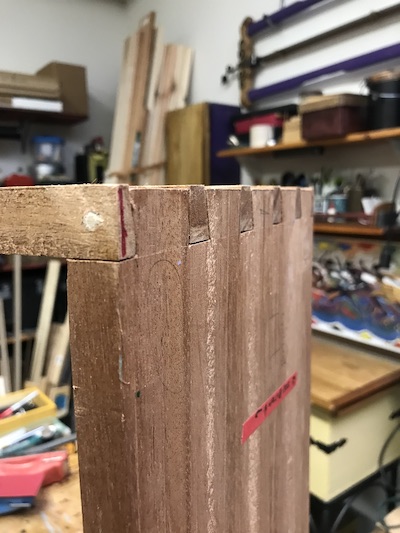
Could a healing be taking place while my shop altar remains a work in progress? It took a while to get here. The primary joinery – the dovetails – have been cut and dry-fitted. It was not a stress-free journey. The remainder of the project looms. Is that word too heavy? It may not be.
After the exercise of cutting, fitting, and praying that those dovetails didn’t implode, I felt like I was in a fight. It was difficult staying the course and moving forward. Well, the dovetails stayed together and I am very happy about that!
Part 5
While I was doing my happy dance, the rest of the cabinet gave me side eye vibes. I turned and saw the rest of the project waiting for me to get busy with it. Certainly it’s not war. Maybe it’s closer to war games. I’ll channel Lee Jun-fan and knock out the remaining tasks.
A healing thought
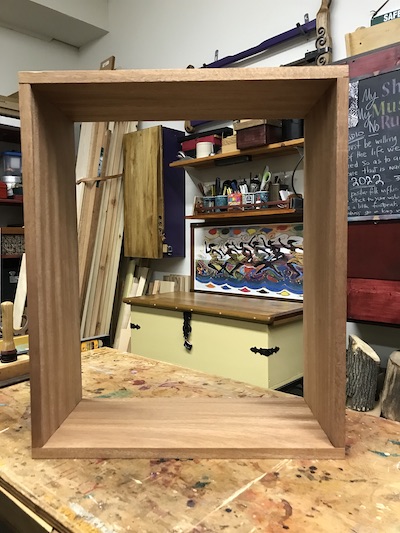
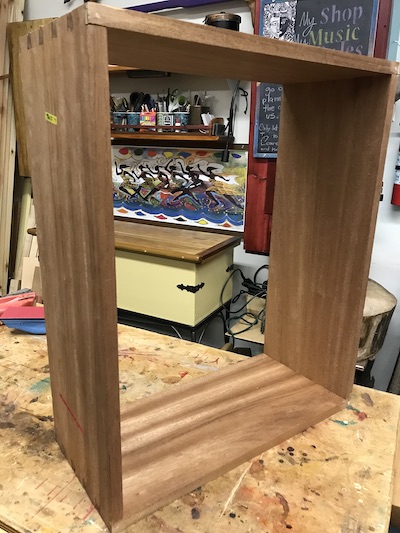
Fitting the cabinet carcass was a real moment of truth.
I am in awe that the cabinet came together!
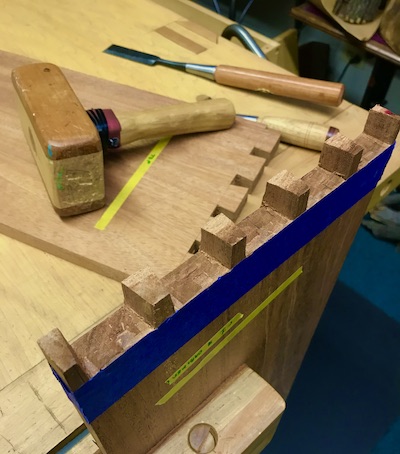
Paring the pins to the marking lines to fit the dovetails was a bit nerve-wracking. I was on pins and needles (no pun intended) that all of this work might come to an unsuccessful end! But it didn’t.
For my entire woodworking life I avoided using dovetails. I cut a few sporadically for practice but none for any bonafide project. My fear of total failure was quite real. I did not think that I could fit all of the pieces or steps together to complete the job. It was overwhelming and almost too personal to reveal even now.
An activity like this fosters a change in how I view my ability to “up” my game. In the past, I used butt joints, pocket holes, screws, and glue as ways to get the work done. When I need to, I still use them. Much of what I made was for utility or practical uses like repairs. The work was not bad at all. It served its purpose. I expected nothing more or less than that. As the need for repairs eased, I felt a strong urge to expand my capabilities.
My work today erases a little more doubt that I might succeed when trying new things. Now I can design and put together many more projects that I dismissed due to what I believed was lack of skill. It saddens me when I think about my unnecessarily long avoidance of cutting dovetail joints for an actual project!
Somehow, there is healing in challenging myself, failing forward, learning from that and succeeding.
One-inch punch
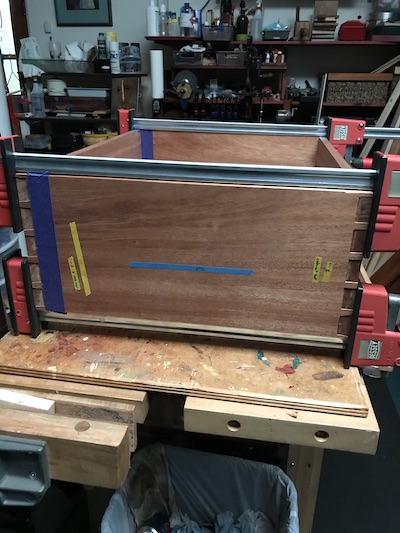
In order to reduce the suspense and my anxiety about fitting the cabinet, I knocked it together and clamped it like I was doing a final fitting. But I wasn’t. It was a preliminary fitting only to see if everything lined up. They did.
Now I have a dilemma. Maybe it is a choice. Can I leave it as it is – together with no glue? Ironically, this would be a first for me! Or do I knock the assembled carcass apart and risk damaging or even breaking some of the dovetails? Yet, the carcass is together except for the glue.
Another thought crossed my mind. Knocking the dovetails apart somehow feels as though I am disassembling pieces of myself. I feel something in my gut. It’s the same feeling I get before a big challenge – like planning and training for my camino.
All manner of things can go wrong or right, I know, but here I feel it’s unnecessary dread. Am I dooming this project to failure if I don’t take these dovetail joints apart and put some glue on them? I’m laughing right now!
I have an idea that I risk letting out in the light of day and even saying out loud.
I like the idea of glue-less dovetail joints. Inherently, dovetails are strong due to their design. My thinking, which may be flawed, is that application of the glue is overkill.
There is only one way to know, right?
Been here before
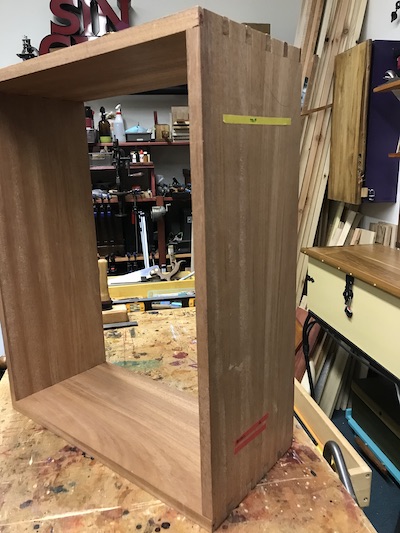
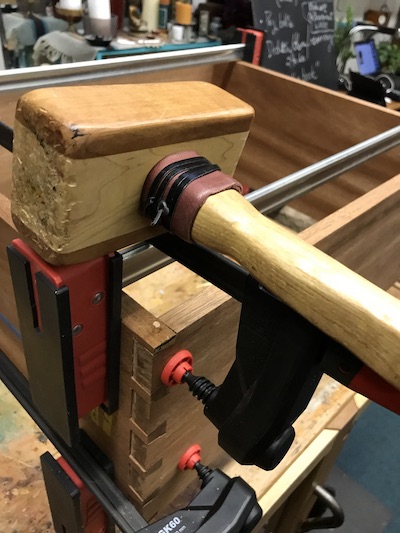
I am going with my gut. I, mischievous woodworker me, am opting not to disassemble the carcass. Instead, I’m going with this intriguing solution of locking the upper and lower dovetail joints with 1/8″ birch dowels. I think “drilling” through the conjoined tail and pin on each corner of the cabinet just may work. Perhaps this altar is working its healing magic on me already.
I’m liking this.
Let’s work the dowels.
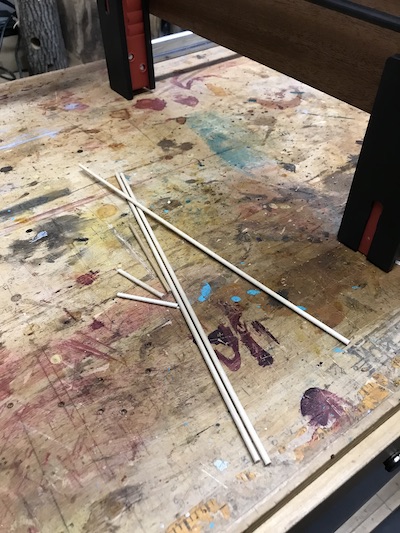
I used a 5/32″ bit to drill a 2-1/16″ long hole through a joined tail and pin. Then 2″ birch dowels are dipped in wood glue and inserted in the drilled hole. A wood mallet was used to “lock” the dowel. This was repeated on the other corners at the front and back of the carcass. That’s eight locked dowels in all!

The carcass is checked for square.

Now that I have completed the pinning, I feel certain that the healing cabinet will be held steady by the dovetails.
That is enough for today.
Baadaye
Shirley J ♥️
________
Next time: cleaning up and building out the cabinet carcass.