Dan Mask Marquetry-Part 2
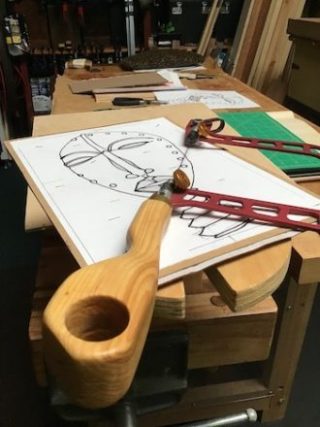
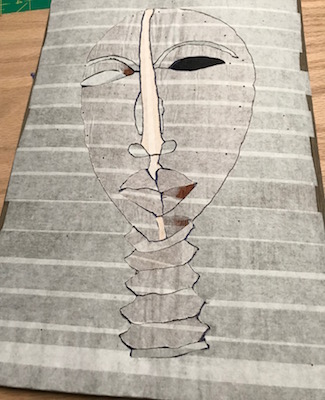
The marquetry “sandwich” or packet was assembled in the last post, part 1. I designed an image influenced by the African Dan mask. It is a sacred object used for protecting and communicating with the spirit world.
I started this project not knowing a lot about marquetry. I wanted to complete a marquetry project. And I wanted the subject or image to be something that I could identify with. After a few days, the idea showed itself. I decided on the Dan mask.
Let’s pick up the project from where I left off.
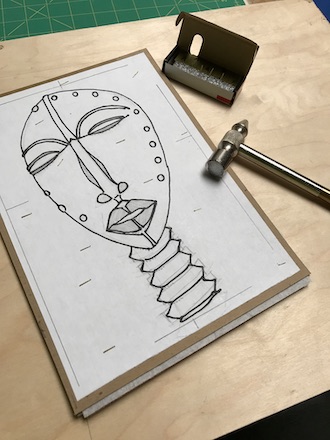
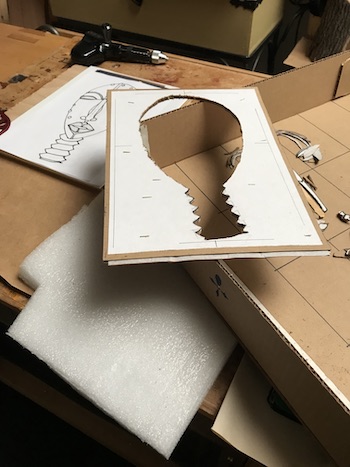
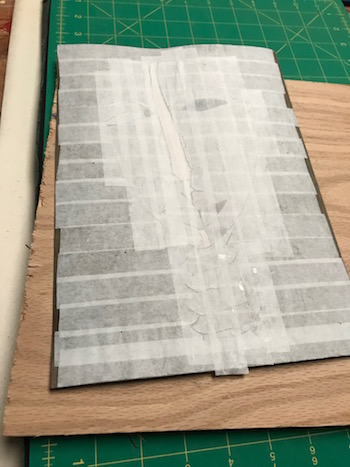
Pinning the packet
Pinning or locking in the packet stabilizes the stack for cutting with the fret saw. A few tiny #23 pin nails were hammered through the background of the cartoon. These are normally used in a pin nailer. Of course, I don’t have a pin nailer but I bought a very small box of pin nail strips. No spaghetti dinner approach this time. I just separated as many nails as needed from the strip with a needle nose plier and called it a day…….. Day!
The pins are anchored in the packet by hammering and C-bending the ends on the top and bottom gray boards. It is important to make sure the pins are not folded over any cutting lines. Everything should be locked down now!
It is time to cut out the veneer pieces.
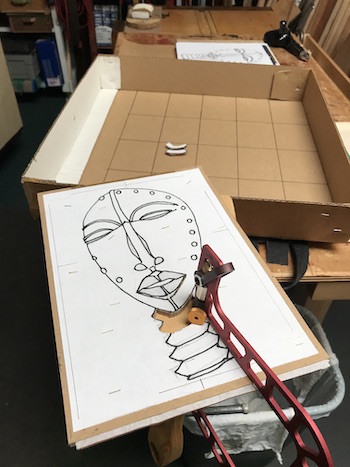
The fret saw table
Since this is a hand tool exercise, a fret saw table comes in handy. This shop aid, usually made from wood, elevates the work surface for cutting. The bird’s mouth or opening helps to keep the saw blade upright. It also serves as a bridge and stabilizer that keeps pieces close to an edge while cutting.
Cutting on the table engages the hands, all of the fingers and the eyes. Adjusting and redirecting the saw blade, and sensing the drag in the blade when it bites into the table are constant reflexes. Also there is an awareness that any one of the veneers may not respond favorably to certain cuts, in a certain direction, at a certain position in the packet. A little improvisation may save the day. It’s like directing a symphony.

The blade is important to a degree… I used a 2.0 spiral blade. It helps with turning and redirecting in the cutting. I did try a 2.0 skip tooth blade, but it had a tough time releasing the packet with each saw-stroke. I could not get a smooth cutting flow. The spiral blade was much better for me. I didn’t break a blade this time or chew up corners in the design.

Cutting up the packet
Setting up the packet on the fret saw table is fraught with a few issues. First, it is not easy to thread the blade through the starter hole while simultaneously holding the saw, inserting the blade in the blade clamp and tightening it! A third or fourth hand would be useful here. It feels good when I can do this without bending the blade too much or breaking it.
Second, where do I begin cutting into the packet? It is best to study the design to determine where the cuts will be made. As each piece is removed, the packet gets weaker and becomes unstable.
The table is limited and not very big. It is very important to get a handle (pun intended) on these issues when using the fret saw and cutting by hand. The wood veneers are dear and sometimes irreplaceable resources.
A starter hole is necessary if the initial cut won’t be made at the edge of the cartoon. Using a starter hole preserves the shape of the background veneer. An intact background makes it easier to fit the cut veneer pieces when reassembling the design.
To make a clean starter hole in the packet, I snipped off the head of a #18 nail. Then, I put the headless nail in a craft drill to sharpen the tip into a smooth cone bit and made the hole.
Some serious sawing
Lastly, the design may have to be adjusted as the cutting advances. Sometimes, a challenging cut threatens to damage parts of the packet. The piece may be too small or an underlying veneer just can’t stand the strain of cutting. Then the ability to reassemble the design to its original form may be endangered.
In this case, go wide or improvise by cutting separate pieces as one. If it can be managed, the pieces can be separated afterwards on the bench with a knife or chisel. Also, there is no shame if you need to abandon the idea of cutting out a specific difficult piece. Hand saw cutting may be just a bit too rustic and rough on that part of the design.
packet. Safekeeping is staged in the grid behind.
Further, I have to keep an eye on the cutting lines and keep the packet stable. The blade may dig into the table. In that case, the packet may have to be turned around or the blade may have to be redirected.
One last factor: the fret saw throat might be too short (as mine is) to reach all over the design. This may require a little redirection or maybe another starter hole to accommodate the cutting. The entire exercise just calls for some creative thinking. Oh yes – safety first – your fingers are dancing with a sharp saw blade!
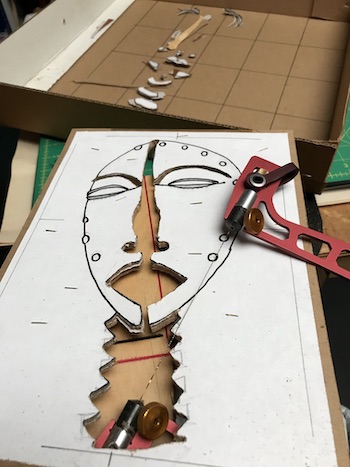
the cut pieces of the stack are removed.
From packet to puzzle
in the packet. It will be retained to fit the cut pieces
during reassembly of the marquetry puzzle.
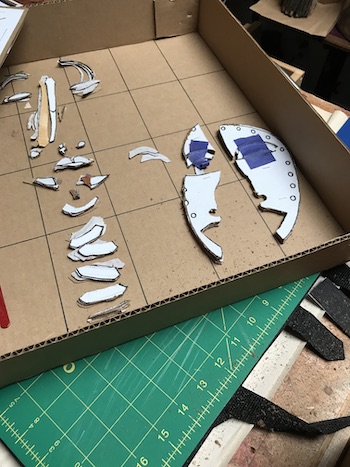
Now all the pieces are safely placed in a grid box. They don’t get lost here. The fun part is sorting through the stacked pieces of veneer and selecting the one that fits in the design.
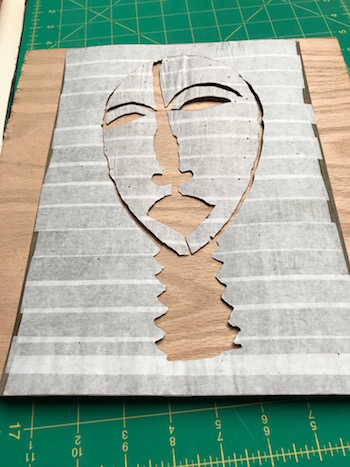
It’s in the tape
Once the larger pieces associated with the design are retrieved, they are placed in the background veneer. The pieces are taped face down using the cartoon as a guide.

The partially assembled puzzle is flipped over to reveal the veneer taped show side.
design before covering the openings with blue tape..
On the show side, blue tape is applied over all the openings for the smaller cut pieces. Turn over to the back and place the matching piece on the sticky blue tape in the opening.
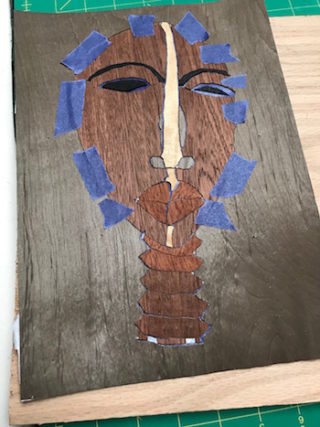
the design on the background veneer.
Any piece can be lifted off the tape and adjusted as needed for balancing seams.
Now blue tape is applied over the filled in surface. Turn over again and carefully remove the blue tape from the front. Some of the veneer tape may come off. That’s a hint to go slowly. Those areas will be reinforced shortly.
Finally, moistened veneer tape is applied on the front over all the seams and over some of the original veneer tape and left to dry.
Beyond the comfort zone
It’s common to put on a mask for the world. We learn to be who others want us to be. We strive to make situations work that are never meant for us in the first place. We try to save face as we move along with a false life, until we end up not trusting the world, when in reality we don’t trust ourselves.
Boldness is needed today. To be continued…
Shirley J 🌹
—–
Next time: Finishing the marquetry project: Part 3, The Mask
