The shock of touching a cold metal handle makes my brain react in a very bad way. Never, ever does it bring a smile to my face. I feel the gray matter in my head frowning for a minute. Really.
Any tool handle made from wood is better for my hands. If the wood has been softened from patina and use, that’s better. Does it matter if it is a cooking utensil, or a pen for writing? No, I just do not like cold handles. Especially if it is in a cold garage or basement… in the winter.
What it is and is not
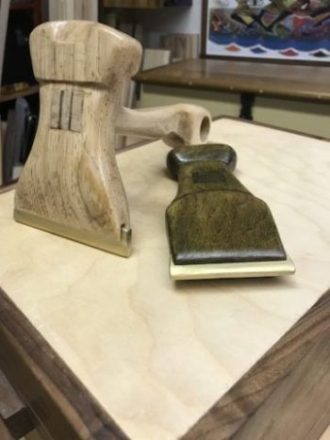
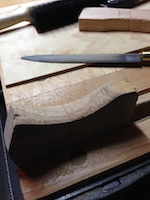
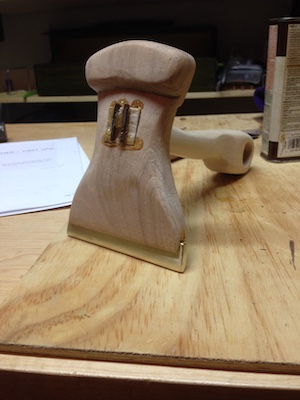
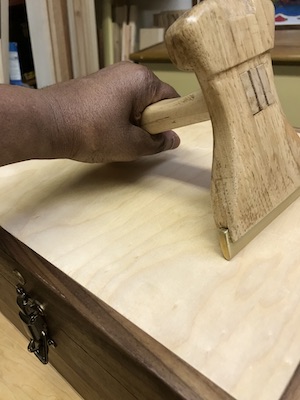
A veneer hammer is a single-function tool for veneering and simple marquetry work. It is not a hammer. It looks like a squeegee. In fact, the tool is used to “squeegee” hot, liquified hide glue. There is even a bit of scraping going on. When you find them in the “wild”, most are made of metal. I said this already – that is not attractive.
Building blocks
So, I made a veneer hammer from wood. I can reach for the tool without wincing. My initial plan was to make a veneer hammer with a handle that would be easy to work with. I believed that it would handle (pun not thought out in advance) most of my projects. Then I realized that a handle is less help and more hindrance in a few instances. I decided to make two hammers, one with a handle and one without.
I worked on the two veneer hammers at the same time following similar steps.
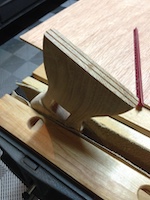
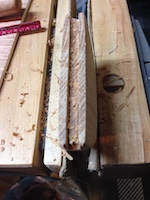
First, I drew a rough shape of the hammer head on an ash block. To waste away the wood, I made a bunch of parallel cuts or fingers on each side to the pencil lines.
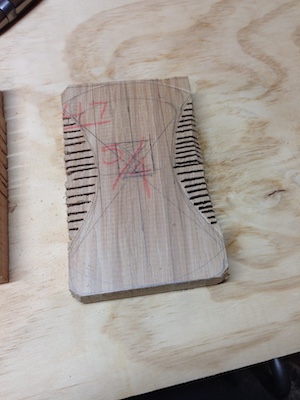
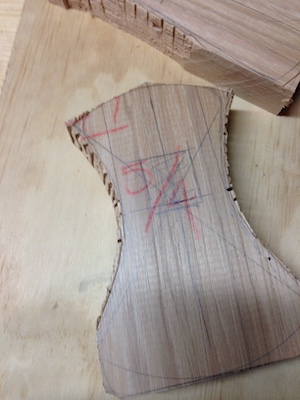
The shape of the hammer head quickly emerges. After knocking away the “fingers”, a bit of rasp work helps uncover the tool’s final shape.
More freehand rasping and shaping.
Birth of a veneer hammer
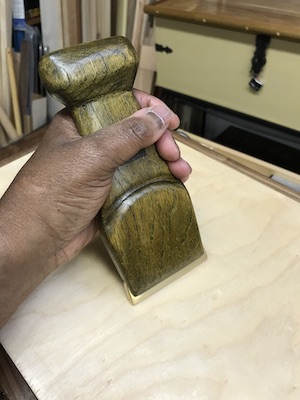
After sanding, the block is placed in a vise. Then a narrow groove or channel is made to fit a flat brass bar or insert in the mouth of the tool.
The channel is dug just deep enough to hold the blade. In this case, a brass insert. I cut the groove a little over 3/8″ deep to accommodate the insert and the glue.
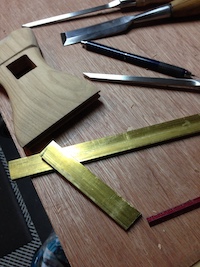
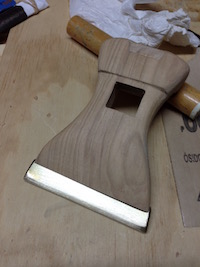
The brass, now cut to size, is shaped, polished, and softly tapered before glueing it into the veneer hammer. I did use hide glue. A 1/2″ brass lip is left after it is gently tapped into the excavated (wood) channel.
Handle time
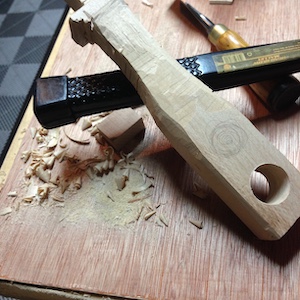
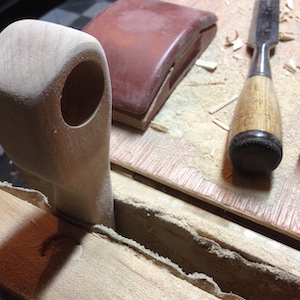
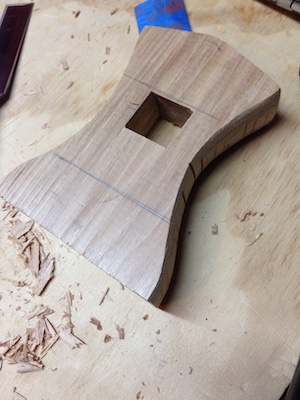
This is the fun part. Working and seeing the handle shape up is exciting. The finger hole is drilled at the bottom of the handle while the block is still flat. Then rasps and sandpaper were used to smooth the handle and the inside of the hole.
Determining how long the handle should be and how much to sand and polish the brass insert is determined as the work progresses. A rustic or polished appearance of the final product is a personal choice. I’m somewhere between those options – an urban appearance, perhaps? The handle “hold” is tested by alternately rasping, sanding and fitting the tool in my hands.
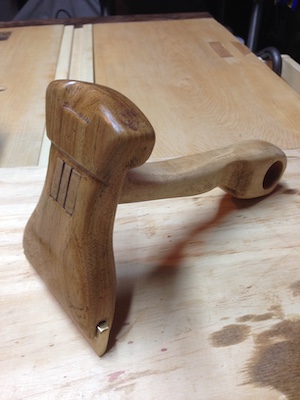
This shape for the veneer handle is my favorite go-to option when I make new and replacement tool handles. It is a little unconventional, but ergonomically perfect for me. The hole at the end of the handle helps keep the tool from slipping out of my hand.
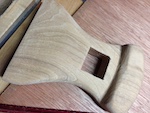
Veneer hammer without a handle
I did the initial shaping of an ash block just as I did with the first veneer hammer.
Shaped and sanded.
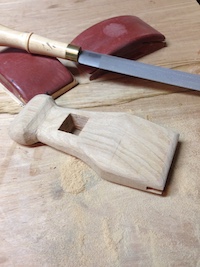
I can use a finger hole for extra gripping. I changed my mind about the square finger hole and, instead, inserted a small block of walnut for interest.
The veneer hammers
without the handle.
S💜
Next time: Warming up before the “Big Picture” marquetry project – a small taste of veneer work.
