
Dovetails for Lunch
Lay out one dovetail. Cut one dovetail. Learn something. Do it again. Last time in part 1, I began a friendly competition with myself with a “breakfast” to fuel my brain and cut that first dovetail. Getting started was a struggle. I froze for a moment after that little talk about prepping the blocks, laying out and marking them, etc. I pondered that maybe this was turning into a race to perfection and that I might just fail.
While I was doing other things in my shop, I couldn’t walk over to my bench to start. When I was away, running errands or just resting, those “potential” dovetails weighed on my mind. I was afraid that I may not do them correctly and that I would not get any better over time.
Eventually, I resolved to simply show up at the bench. I re-read my recipe for making dovetails and began – one cut at a time.
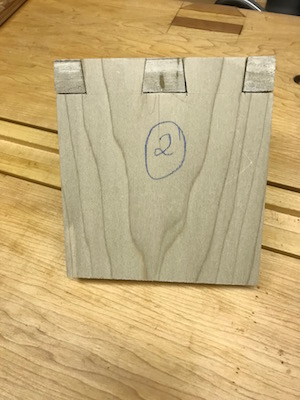
Here is what it looks like
It’s a start and it isn’t bad. The “ice” is officially broken.
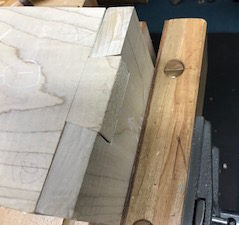
Sometimes, all you need to do is start… and finish:
Inspecting my work with self-compassion:
There is a small gap on the left side of the tail. I am not judging myself too much. Why did it happen? I strayed from the waste side and crossed the line when sawing. Yes, it’s about sawing as straight as I can.
In spite of the skewed sawing, I am happy that I took a deep breath and made that first saw cut. It is funny that I kept thinking to myself, is this all there is? Is that all there is? Certainly not, but it is one more thing out of my way. Once again, the 16 foot beast was slain and revealed as that big obstacle living only in my mind. I imagined it being bigger that I thought and, perhaps, too big to conquer. Isn’t that true of many things we have to face in life?
Back to the challenge!
Lay Out Two Dovetails
- cut two tails and the pins
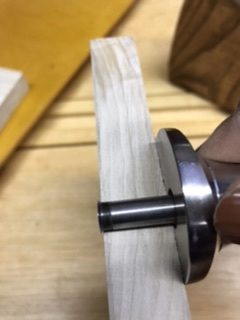
I like the circular marking gauge for circumscribing the baseline on the tail block. The tool is set to the thickness of the pin block. If both blocks are the same thickness, that’s one less prep detail to worry about. The pin block is only marked on the two faces.
baseline defines the boundary of the joints on the tail board.
Marking
A lay out tool like a dovetail marker (it’s optional) helps to make consistent angles for uniform tails. I used a 1:8 (7 degree slope) marker here. Dividers are elegant instruments for precisely laying out (positioning) the “show tails”. They do look nice but take more time and effort to achieve. Since I am starting my dovetail journey, I positioned my lines by eye.

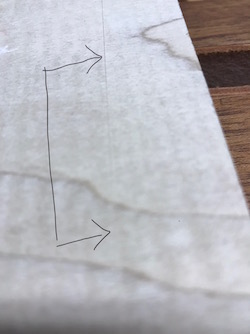
See scribed line on the edge of the board.
I used a sharp pencil to mark the cutting lines. For the moment, it was easier than using a marking knife.

Sawing
I laid the saw teeth slightly left or right of the cutting line trying to stay on the waste side or cutaway portion of the block. This can be nerve-racking.
The key is sawing a very straight line.
I’m sweating a little bit.
Now, I have a few tools that I can use to remove the waste block. A sharp chisel will chop out the excess wood. A fret or coping saw can sometimes speed up the removal.
I chose a fret saw.
Sawing across the waste block close to the scribe or baseline with a fret saw takes concentration. I do not want to saw off any of the baseline. Close sawing across and above the baseline, but not on it, makes finish chiseling less tiring. Squaring up and pairing the tail block and pin block is more efficient, too.
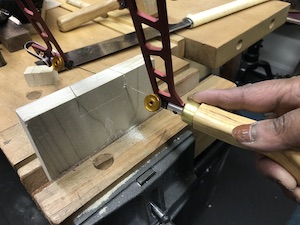
I like the smaller, delicate blade.
Here is something to think about. Is a fret saw better to cut out the waste from making dovetails. Is the coping saw worthy?
The choice between the fret saw and coping saw is a personal one. I find the coping saw a little clunky and more difficult to fit in the kerf and turn the blade. The fret saw blade is more delicate, a bit fragile, but more “agile” after the kerf entry. Importantly, the saw easily slips into the kerf and bites into the waste block.
Finish chiseling and Fitting
Further preparation for fitting the tail board to the pin board requires chiseling any remaining waste between the pins. It takes a little time to clean up the waste whether a fret or coping saw or chisel is used.
Cleaning up the remaining waste wood requires care and patience.
A wise tactical move here is to mark a line slightly ahead of the baseline (into the waste block) with a chisel. This is the temporary line where all of the chiseling terminates. The original baseline is regained by chiseling to it. I just had to make sure all of the lines and angles were maintained.
Tapping in the alternate baseline:
A little time – or a lot – for fitting the tail board to the pin board may be needed. If you get it on the first try, know that you are fortunate. Often the walls of the pins or tails have to be shaved in order for the joint to fit. It can get ugly. Back and forth, fitting and shaving, but finally it falls into place. I know one thing – I am getting my feelings hurt and learning a lot at the same time!
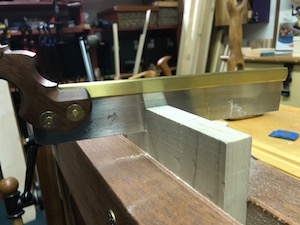
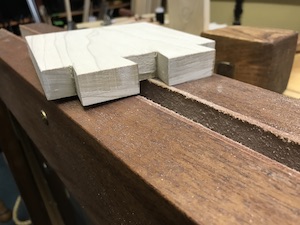
Lunch is ready


It’s getting better. Really that’s all I want:
I view each day in my wood shop as an opportunity to meet life’s challenges and to wander in and out of my comfort zone.
– Shirley J
This challenge is certainly doing that for me!
S♥️
——
This is the end of part 2 of a 4 part series on dovetails and other things.
Next time: part 3. Dovetails for Dinner — and a little talk about the role of the saw.
