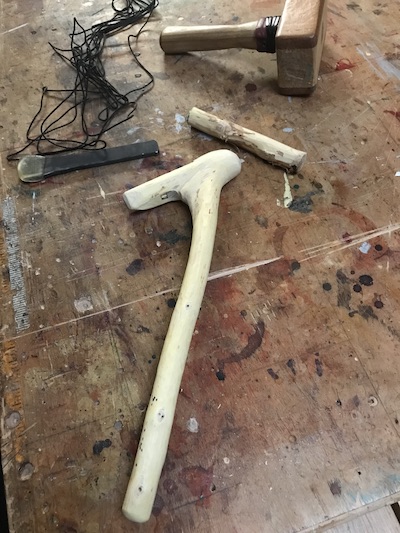
After a storm, I found fallen elm branches that were the perfect size for the handles, also called hafts. The branches were put away to dry and acclimate to the shop. Then I debarked the branches with a drawknife and chip knives. The wood was put aside to dry some more. It’s been a couple of years…
A strong lashing technique practically guarantees that an elbow adze will be safe to use. Last time, I began a journey to make these adzes.
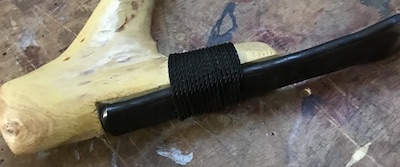
Lashing the blade to the handle
Heed the shop poem.
The wood blanks for the hafts or handles have been debarked and cleaned. The heads have been flattened for seating and lashing the blades.
Lashing is important for aesthetic and safety reasons. It must be done with a strong and stable material such as twine or tape that will not stretch or unravel when the blade is being swung around. There are other techniques that will secure the blade permanently or temporarily. I like seine twine for my project.
Seating the blade on a flat handle head helps to stabilize it and keep it from twisting to either side. It is critical to lash the flat face of the tool to the newly carved flat plane of the handle head.
Clamp the adze handle in a vise. This frees your hands to do the lashing. It is safer, too. Safety and common sense require that the blade be covered while working.
The steps
First, lay the cord on the blade in a long flattened loop that extends along the top of the blade. The loop “fold” is at the front of the blade and the tail or loose end of the loop is at the back.
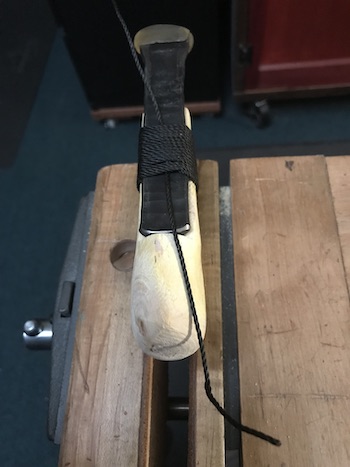
At the back, start wrapping the twine tightly around the long loop, blade and flattened handle head. Keep wrapping tightly until a measurable amount of the blade is covered. At this point the loop will be within reach at the end of the wrapping. Cut the cord leaving about 8″ hanging from the wrapping.
The loop fold and the cut end of twine will be on the same side.
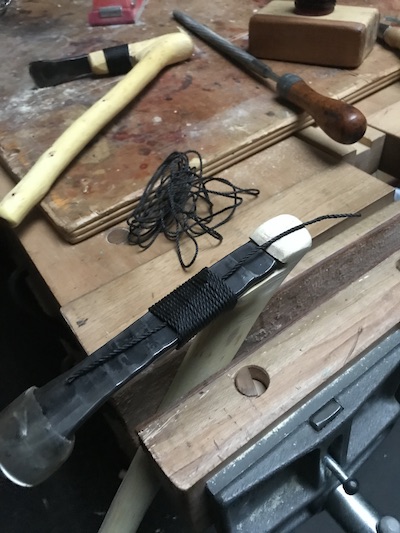
Thread the cut cord end through the loop. Now, pull the first loose end of the twine (from the opposite or starting end). Keep pulling so that the threaded loop and the cut end travel together under and through the wrapping. The threaded loop emerges from the wrapping on the starting side. Cut it. Cut the loose end as well.
The loop may resist and “stick” under the wrapping before reaching the end. No fear; just tug the cord to make sure it is tight and absolutely immobile. Cut closely so that it is buried in the wrapping. The cord will be “locked in”.
That’s it!
Here is a closeup of the seating and wrapping.
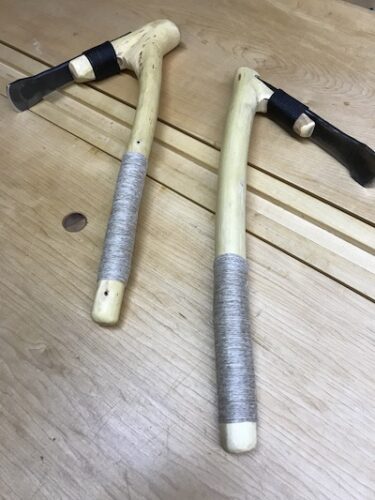
The two elbow adzes.
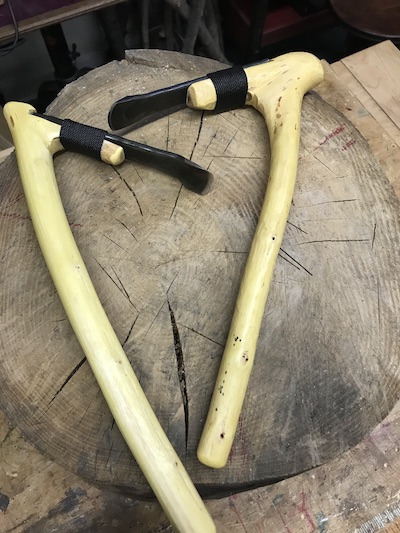
(left) and straight blade (right). Both have been lightly rubbed down in oil.
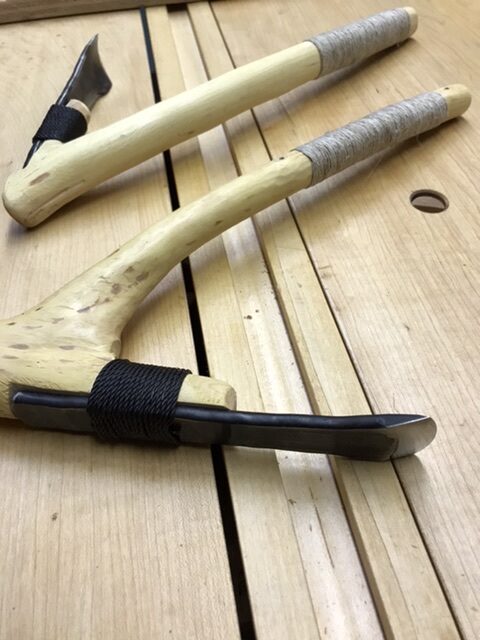
Bonus Wrap
Lastly, the handle extension was wrapped with hemp cord. The wrapping helps maintain grip on the tools when carving or hollowing wood.
to the handle head was used to bind the handles.
The blades are attached and lashed. The grips are wrapped. How is that for, not one, but two shop made tools?
What is next? Protective sheaths to protect the edges of the tool, of course.
_______
Baadaye.
Shirley J ❤️
Next time: Leather sheaths for the elbow adzes.
