Recollections of my early projects are just that. They were done by hook or crook, without “good tools” or simply, by my bootstraps. Some, like the roof access hatch, were completed years ago when I had no inclination to record my work in any detailed way.
These stories are meant only to entertain. They may provide an idea, a solution, a lot of oh-oh’s, a few oh no’s, or a nod of agreement.
I am always doing what I cannot do yet, in order to learn how to do it.
– Vincent Van Gogh
Story #7: Roof Access Hatch
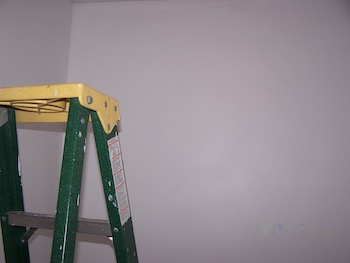
Ladders are the best tools to use to get to the roof of your house. What if you are afraid of heights? Or, you don’t own a very tall ladder?
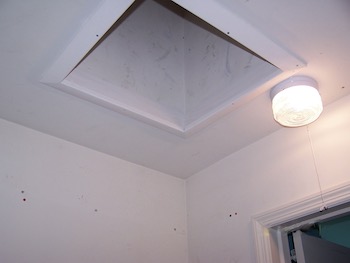
A scuttle hole cover or access hatch in a closet or laundry room provides a convenient way to climb to the roof.
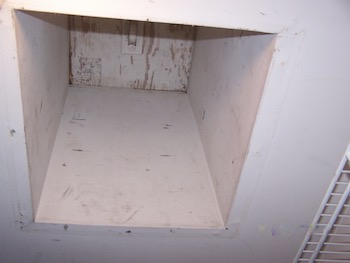
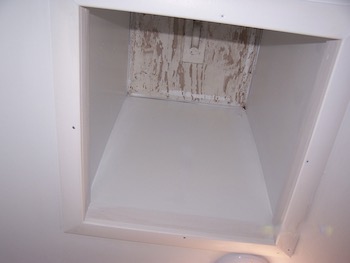
This access hatch is exposed to the elements. The hatch opening leads from the closet ceiling to the roof. It is covered by a weighty outside cap that secures the hatch from the top, but that is all.
The egress is not insulated. That space is very cold in winter, since the outer walls have a northern exposure. Walking into that closet on cold mornings is not a pleasant way to meet the day!
Let’s put a stopper on that opening.
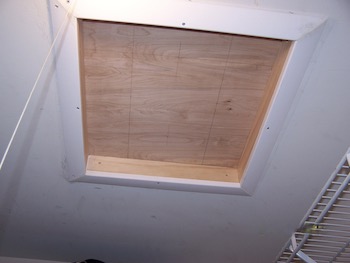
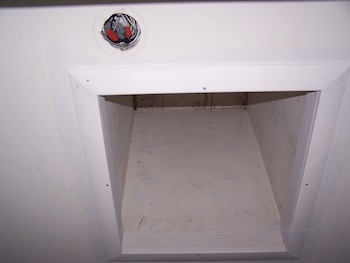
The hatch opening is dark and cold. It looks a bit worse for wear and needs a bit of paint. Another thing it needs is something to stop the cold – an insulated hatch cover.
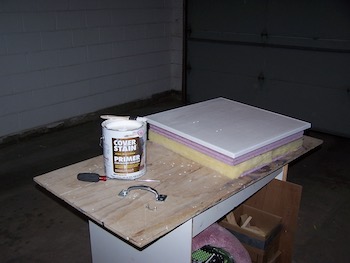
Constructing the hatch
Inside the scuttle hole opening I fixed 1″ by 2″ boards to form a “lip” to support the cover.
The trim also creates a rise for the lid. It will hold and elevate it 2 inches into the hole.
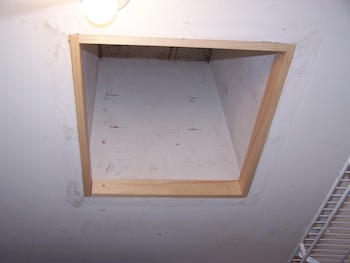
Importantly, the trim works as an air seal, further insulating the opening.
On the outside, I mitered ranch casing moulding to fit onto the ceiling at the edge of the trim.
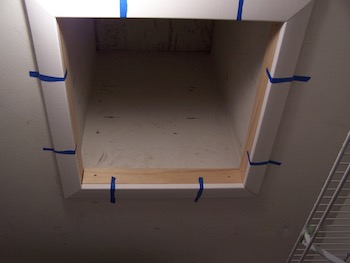
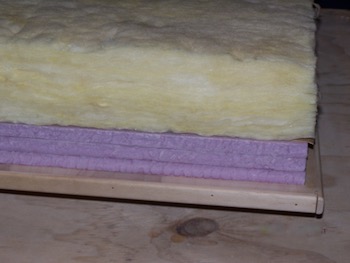
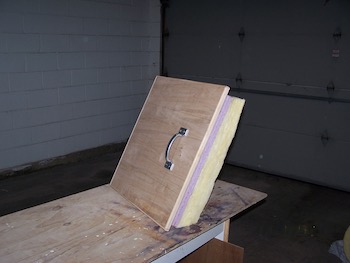
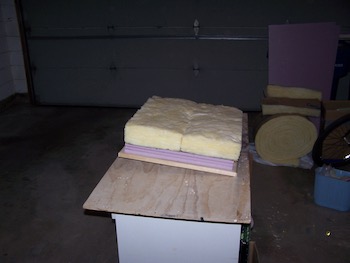
The hatch cover was built up from layers of 3/4″ plywood, solid pink foam and (yellow) rolled insulation.
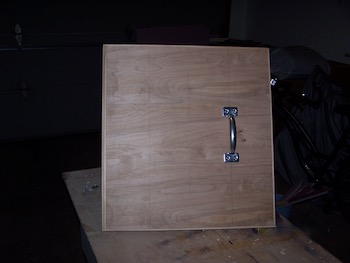
The cut edges of the plywood were trimmed with 1/4″ x 3/4″ moulding.
Let’s put a little light on the situation.
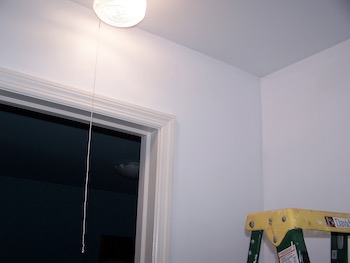
Ceiling light
The original light in the closet was a bare bulb screwed into a socket in the ceiling. That light was quite harsh on my eyes when I had to look for things high up. Also, touching a hot bulb or breaking it was always an accident waiting to happen. I was glad to get rid of that setup!
So while I was at it, I replaced that with a nice flush mount ceiling light. The cover diffused and softened the light when it was on.
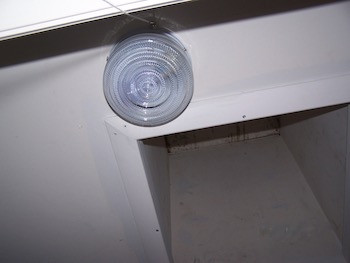
Now this is much better for my eyes, especially in the early morning.
Back to the hatch
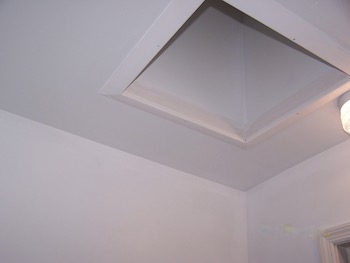
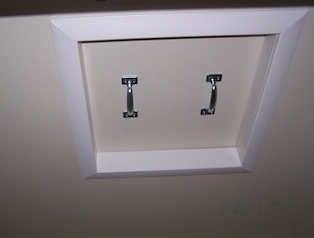
A look up the newly painted walls of the hole.
After assembling, the hatch lid was primed and painted. Two handles were attached to enable easy removal and replacement of the lid in the ceiling opening.
I still need a short ladder to reach the hatch and pull myself up. It is better, however, than the 32 foot ladder I normally use outside.
The underside of that cap on the top needs to be painted… to this day! That task is on the list.
Fortunately, it cannot be seen when the hatch is in place.
The new hatch cover/lid is doing its job, too, keeping out the cold. It pushes up and out of the way for access to the roof. Winter is coming and I feel warmer already.
Was it worth the moderate investment of time, effort, and cost to do this?
_____
Baadaye

♥️
If you are going to make any project, be mindful and be safe.