Sharp blades should have a cover or sheath to protect the user and the tool. Here I plan to make a sheath for the adze that I ordered and finally received in the last post.
From time to time, leather is handy for adding interesting details to my woodworking projects.
A heavy-duty leather sewing machine would make the project easy. You guessed it; I don’t have one. I sew leather by “necessary means” with a home sewing machine or by hand.
When I make sheaths for my edge tools, I usually make it up as I go. Of course I minimize the cost of any missteps by using materials, often scraps, and supplies that I have on hand.
A Quick Paper Pattern
I made a rough outline of the sheath on brown paper. Then I added margin allowances for the rivets and the welt.
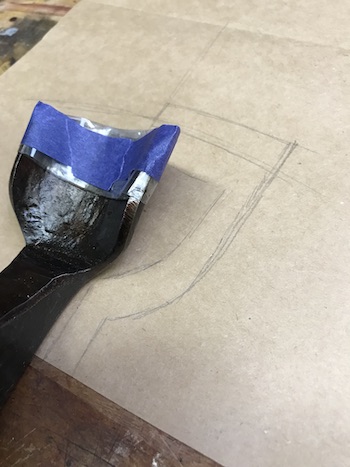
I don’t spend a lot of time sketching. The exercise helps me determine how much leather I need for the cover. It is literally putting ideas to paper and my brain in motion. Changes can always be made later.
the adze sheath.
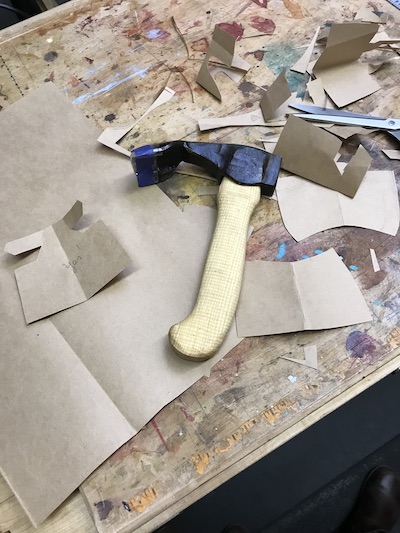
I made paper patterns and played with them. Obviously, the goal was to cover the tool blade or sharp edge. The most important criteria, however, is to make sure the sheath does not easily fall off of the tool, in or out of storage. A collar, then, must be incorporated onto the sheath. Uncovered and partially covered sharp edges love to bite. The likelihood of injury increases with excess manipulation of the cover when taking it off and putting it back on. Be watchful.
Working the Leather
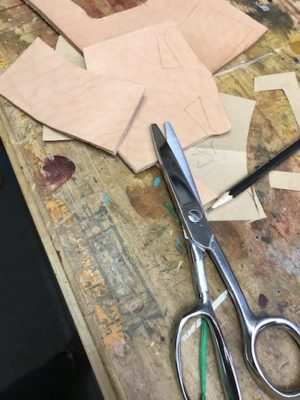
I picked a scrap piece of 8-9mm vegetable tan leather. It’s heavy and thick. The paper pattern was traced onto the leather. I used leather shears to cut it away. A sharp utility knife helped define corners in this thick material that I couldn’t reach with the scissors.
Wet forming the cover
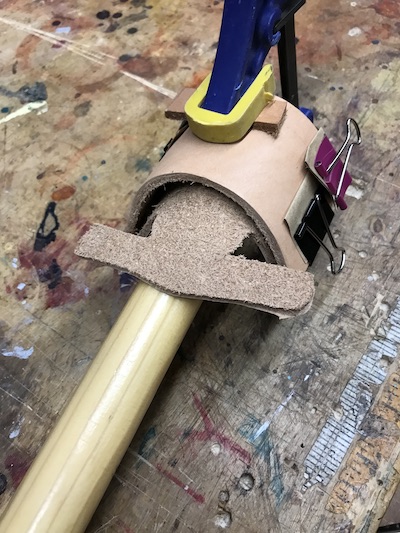
Sheaths for curved edge tools, like spokeshaves and adzes, are usually good candidates for wet forming. Before starting the work, I covered the edge with painters tape. This provided more clearance for fitting the tool in the finished sheath. Next, I wrapped the entire blade in plastic.
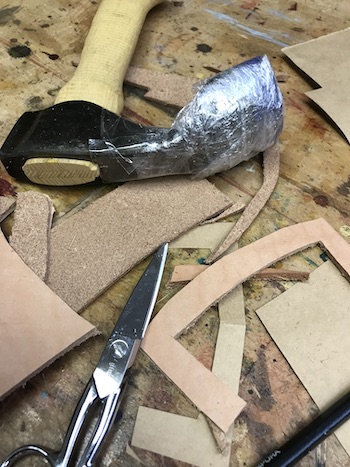
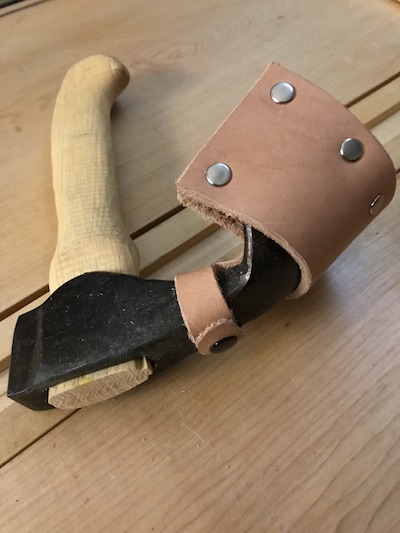
Then, I formed the leather around the tool.
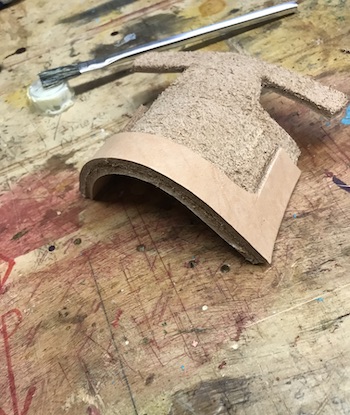
For the adze, I cut leather for the top, welt, and back in graduated lengths. Thus they are not the same size as they would be for a straight edge tool. However, when I formed the curve over the adze blade and face, the edges of each piece line up, giving the illusion of matching perfectly. Flat, the pieces have a stair-step effect. Curved over, all the edges line up. I left plenty of wiggle room for the blade and the rivets.
Then I wet it, conforming it to the shape of the blade and let it air dry, usually overnight. It does not take long for damp leather to begin mildewing so I didn’t leave it on the form longer than that.
After removing the adze from the form, I continued processing it by cleaning up or straightening the edges of the leather with a sharp chisel.
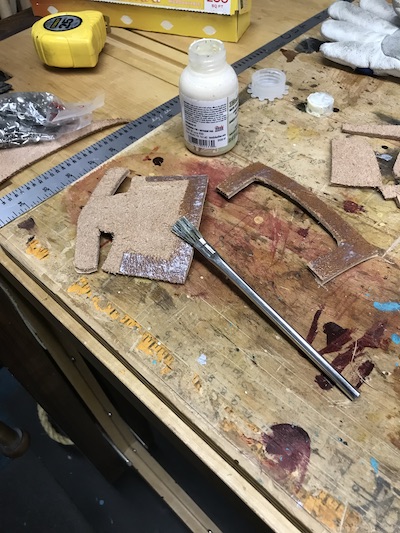
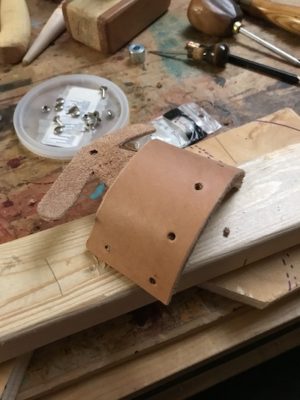
Then I glued them this way. Since the leather was thick, I first glued the welt in position on top of the bottom closely following the curvature of the adze.
Now the glue
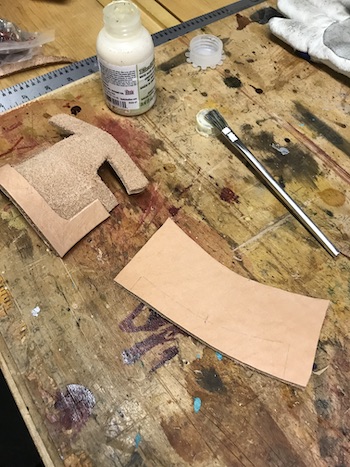
I placed the leather top over the welt and bottom, test fitting with the adze. Eventually, a “sandwich” of the sheath top, welt, and bottom was created.
Then I secured the “sandwich” with glue.

To hold everything together, I used large paper clips with brown paper. This prevented denting and unintended marks on the leather.
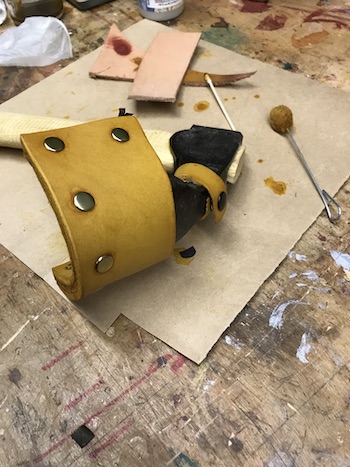
Holes and Rivets
Holes for the rivets were made with an awl and a small leather hole punch.
Small leather rivets were fed through the punched holes.
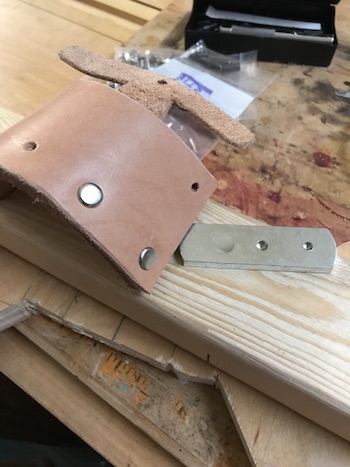
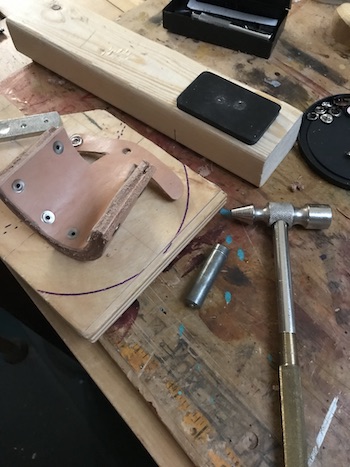
Although rivets can be applied in the leather in a number of ways, a proper rivet setting tool will keep everything neat. I use one to avoid crushing the surrounding leather while hammering.
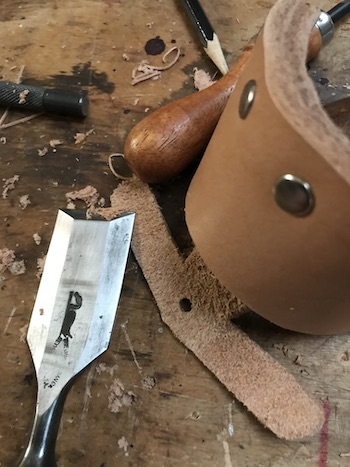
I applied a small snap on the collar of the sheath. This is the important “link” in the process to keep the sheath covered (under most conditions) when not in use.
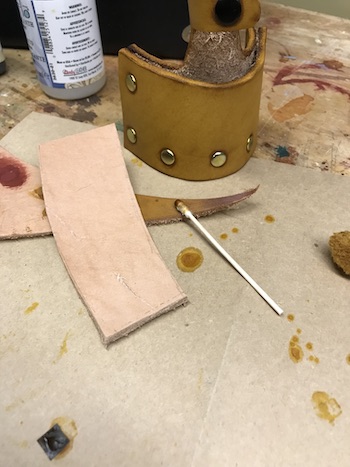
Staining the Leather
The leather’s surface must be studied and a strategy for dyeing each item must be developed so that no important areas are missed. It is difficult to come back to correct a missed spot without it looking obvious and ragged.
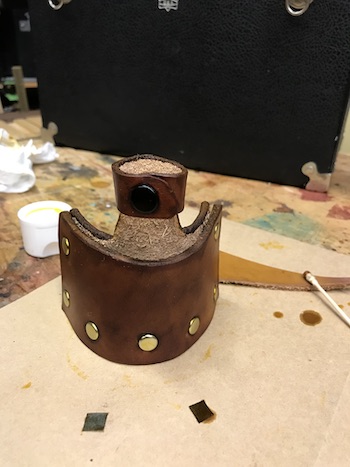
During application, the yellow dye appears dark or even dark red. It is saturating the leather. The dye must be applied quickly to each section and gently rolled over the previous section’s edge. The goal is to prevent patchiness and uneven drying.
application.
Drying begins almost immediately, so the work must be completed in “one take”. Too much surface drying on a partially dyed piece will leave obvious overlap lines.
yellow color, here, indicates that the leather is 99 per cent dry.
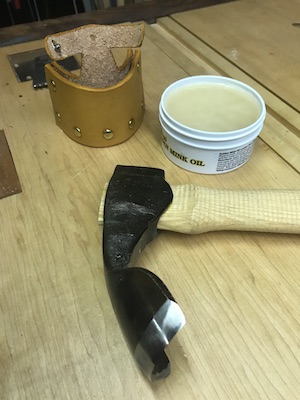
First Conditioning
After the leather is completely dry, a small amount of mink oil is applied.
Making Sense of a Cover
The adze is a surprisingly heavy tool that has to be handled carefully. The top heavy head can suddenly swing around and cause serious injury. Dropping this tool can cause damage to the blade edge. Sometimes these two scenarios conflict, ha ha… ouch.
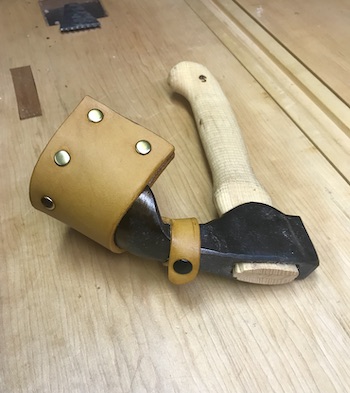
More views
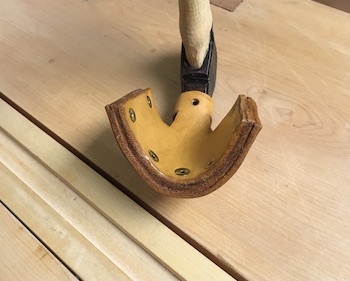
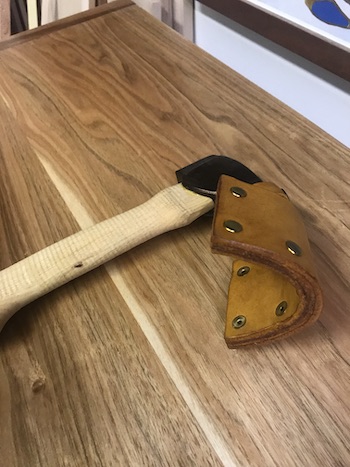
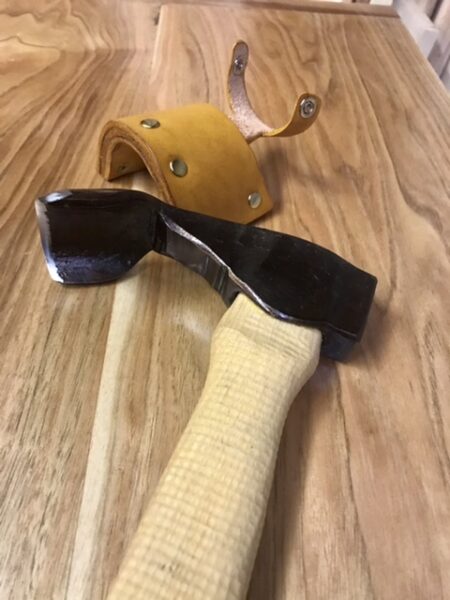
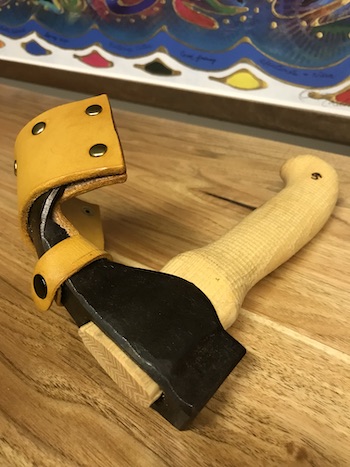
The mighty adze!
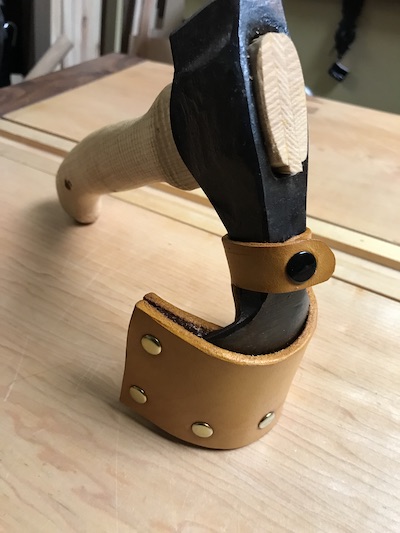
The sheath, somehow, seems mightier. Would you agree?
Baadaye
Shirley J ♥️
