Practicing laying out and cutting dovetail joints isn’t much of a challenge. Becoming good at it is the real competition. Against who, you might say? Myself, of course.
Each winter I put together a list of woodworking and repair projects. This time I’ll start by taking a few weeks to cut a bunch of dovetails. My prize is improvement of my layout and cutting skills and development of muscle memory. I want to make this joint with my eyes closed – figuratively speaking.
A woodworking feast
Starting each day with a bit of breakfast provides energy and food for the brain. It keeps you going and reduces the cravings for mid-morning snacks that may derail your health.
I’ll apply this line of thinking to the project. First, I’ll put together the “utensils” or tools that I need throughout the feast.
Next I will pick the wood that is best for sawing, cutting, and fitting dovetail joints.
If you are thinking of doing your own challenge, take note of the shop poem:
Whenever you make anything, modify or conform choice of wood, measurements, tools and techniques, fittings, and finish according to your own skills, preferences, needs, space, and circumstances.
A dovetail kit
Now, this is not a very strict list. I am using what I have on hand – tools that I have accumulated over the years. Remember the spaghetti dinner?
These are the tools:
- dividers,
- saw for dovetailing,
- paring, dovetail, and bevel edge chisels,
- marking gauge,
- sliding bevel,
- dovetail marker,
- combination or try square,
- mallet.
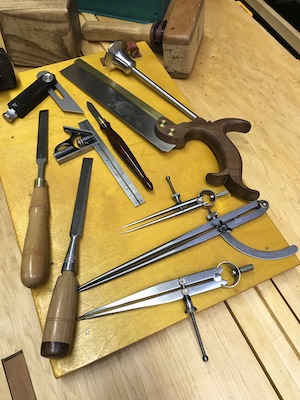
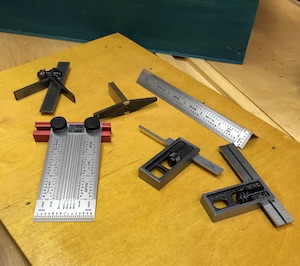
Layout and marking tools are useful:
Sometimes, dovetails are cut organically, that is, without layout tools. Before the modern push to showcase them, dovetail joints were just “eyeballed” on a board and made freehand. No layout or marking tools were used. During the challenge, I will cut a few this way.
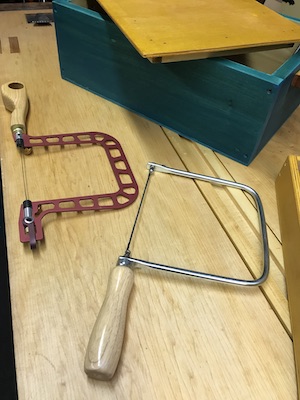
I will have these on hand, too:
- fret saw and coping saw
for removing the dovetail waste.
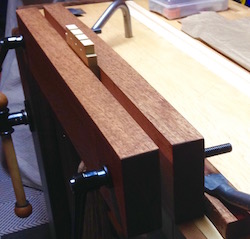
Dovetail helper
- moxon vise
That puts a steady hold on the work. I made the moxon vise for the very purpose of cutting dovetails. It is one of those shop aids which is nice to have but not necessary. If you don’t have one, a bench vise, a few clamps and holdfasts will do. You just need to put a steady and strong hold on the work.
A bench
- wood bench
Although it is not a must have shop aid, either, it makes work life easy and, even, enjoyable. I can say it’s nice to have for staging the tools and materials.
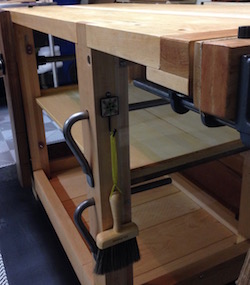
I made a wood bench, a roubo bench, that I am satisfied with. It was an upgrade from the setup I worked on for many years: a hinged plywood sheet that rested on two shop made sawhorses. After a long day slaying the 16 foot dragon, folding and putting that plywood away was a real chore!
If you do not have a bench, use a table, a desk, or a nice flat surface you can work on safely.
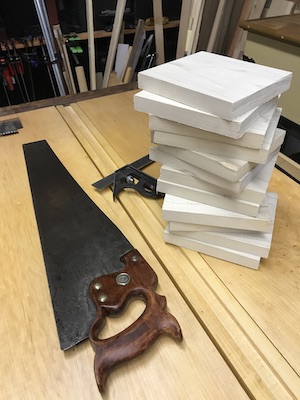
The best wood for dovetail work
- wood
Poplar, soft maple, and walnut are woods moderately firm enough to make crisp cuts. Contrasting wood colors for the tail boards and pin boards would put a nice-looking touch to each finished joint set.
I have a small box of scrap wood from past projects. A rummage through it may give me enough pieces to get started. I’ll visit the lumber yard midway through the project and pick up a few more boards.
Update
I went to the lumber yard, anyway, looking for dimensioned (dimensional) lumber close to 8′ long, 6″ wide, and 3/4″ thick. It would eliminate some prep work and help me to get started sooner.
Higher prices amid the pandemic forced a small modification to my budget.
Yes, price was the biggest influence. The dovetail blocks would be 6″ square. That is the current plan. I could buy bigger boards and rip from those what I need. I could save the rest for later projects. But it would take even longer to go through the stacks. I just did not have the luxury, this time, to buy more than I needed. So, I kept to my plan to stay within my budget, pick my boards and get back to my shop.
What I picked
Poplar.
The stock was very low. After a bit of time scrounging around, I was able to pick out two boards : both 8′ x 6″ x 3/4″.
Next, I looked for walnut to provide a contrast to the light color of the poplar. Nothing! Well, there were no dimensioned pieces of eight foot stock at 6″ or 4″ wide for that matter. I had to think fast. How about a piece of cherry as a good substitute? No luck! I walked past the walnut to look over the birch. Pickings were quite slim there too.
Now, my brain was cooking. I stepped over to the imported woods and eyeballed the mahogany and sapele. Ahh, that mahogany was scarce and just too expensive.
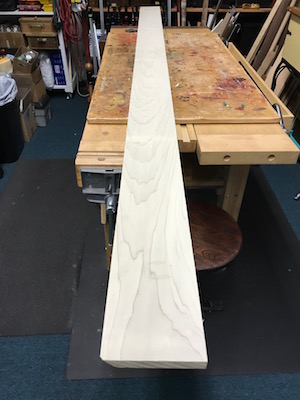
Sapele.
This choice surprised me, too. It cost a little more than I wanted, but it would look great. I looked at it as a treat for myself after rooting through all of that wood. Mindful of my budget, I bought only one board: 6-1/2′ x 6″ x 3/4″.
I still needed one more reasonably priced board.
Soft maple.
I rooted around the stacks for quite a while until I decided on a 7′ x 6″ x 3/4″ board.
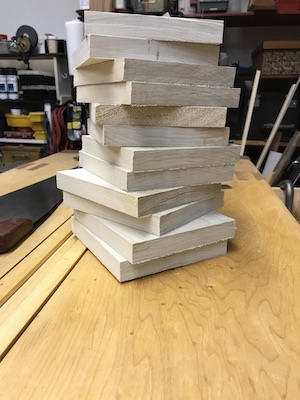
Now I had 4 boards and a few pieces from my scrap box that should yield a little over a month’s worth of dovetail sets (pinboard and tailboard) and a few pieces for sawing practice and do-overs.
I am glad I didn’t wait until later to get to the lumber yard!
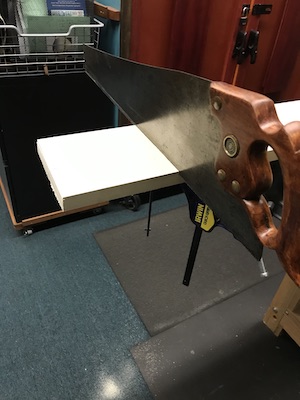
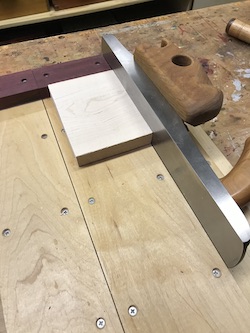
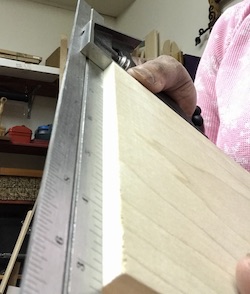
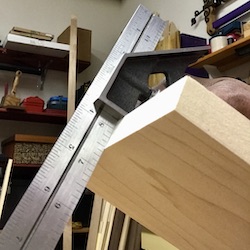
Prepping the blocks
Making sure that blocks are square reduces cumulative marking and sawing mistakes. It keeps you from chasing a dovetail that will not come to be… ’cause it can’t.
If sawing by hand does not result in square edges,
- plane them square in a bench vise, or
- straighten them using a shooting board.
Fittings can now be made with ease.
Starting
Ok, now I can practice the dovetails no matter what I am doing in my shop. I will allot an hour for the layout and cutting, initially. Until I complete the first one, I won’t know if I need more or less time.
Dovetail Recipe
- cut one tail and the pins,
- use a cutting gauge to layout the baselines,
- use sharp chisels,
- remove waste between pins and tails with a chisel, fret or coping saw and mallet,
- use a marking knife or pencil to transfer tails to pin board,
- use deliberate, paring cuts when approaching a line,
- inspect your work with a keen eye,
- make notes for improvement,
- mark the date.
Strategy
Perfection is not the goal – anymore. The right attitude, efforts, and actions will get you there. Begin in the mind.
Ready. Set.
Shirley J ♥️
———–
This is the end of part 1 of a 4 part series on dovetails and other things.
Next time: part 2, Dovetails for Lunch: Lay Out and Cut Dovetails. We’ll have a little talk about those first dovetails.

4 thoughts on “● A Dovetail for Breakfast”
Very good work thanks
Thank you for reading. There is more to come.
Thank you for sharing your maker wisdom and woodworking talent, Shirley. Have a beautiful day ☀️
Thank you for “watching”. There is more to come!❄️❄️❄️
Comments are closed.