The carpet is gone and the stairs are ready to finish. Last post, I found that the wood beneath the old carpet was pine. It was in good condition. The pre-1980s wood was perfectly shaped and nosed.
New Identity
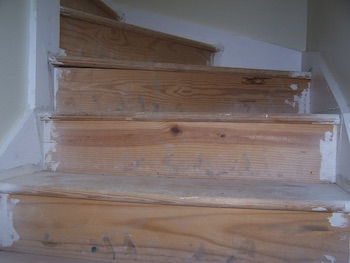
I looked at the steps and thought about my next move. The overspray was not as bad as I expected it to be. A small electric hand sander was my weapon of choice in this battle.
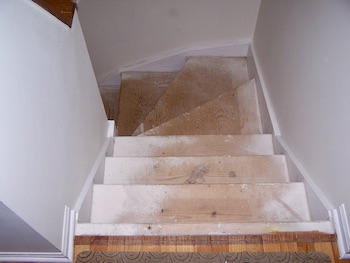
Paint overspray on the steps is an interesting thing. Contractors do not take a lot of precautions to protect the wood from the paint. After all, the steps were going to be fitted with carpet. I am certain this saved money, time and labor. I did sense a bit of restraint because the steps were not drenched in paint. After all, the steps were needed for accessing the rest of the house under construction.

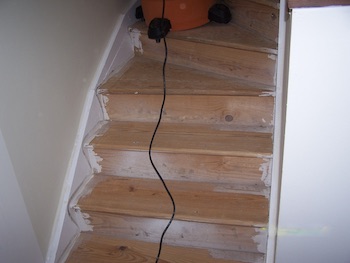
The wood treads were good quality material and I could see that the risers were too. I’m just glad that the paint was not very heavy or difficult to remove.
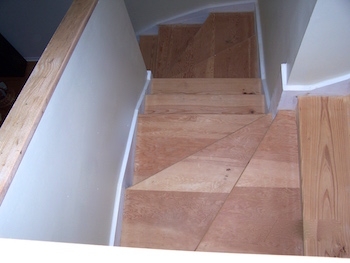
The plan coming together was overwhelming. As I sanded the wood, I thought about finishes.
Those stairs!
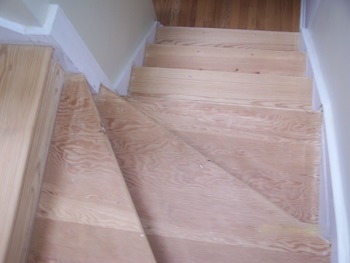
The clean steps offered a blank slate, an empty canvas and an opportunity to make something beautiful.
Room for creativity
I love color! And my house is my canvas. That is a corny statement. Ok, I will say it again, but only if you ask. A house full of color fights off the barren feeling of the cold winter blues. It keeps summer in the building all year long.
It is my defense against what I consider a harmful belief that terrorizes many homeowners. I see how the oppressive mantra of “resale value” contributes to unnecessary choices and unhappiness. I liken it to a straight-jacket. It is living for that unknown future occupant who will somehow reward you for not living your life in your own home.
My friend, “mischievous me”, would not allow me to do that. I am not saying that taste does not enter the picture. Taste and couth certainly do.

finish techniques for the treads and risers.
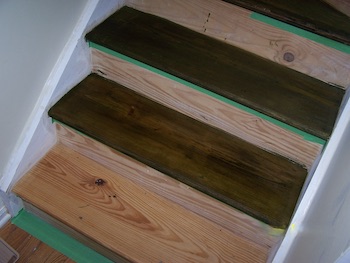
Dye staining the stair treads
I experimented with dyes, stains, and paints to get the color that I wanted for the stairs. A color that I decided on was a green dye stain that was not extreme. In the back of my mind, I thought if this did not work out, I could cover the stain with a darker brown color.
Again, the work was done slowly and carefully to see how the color and stain would set up on the wood. No problems occurred.
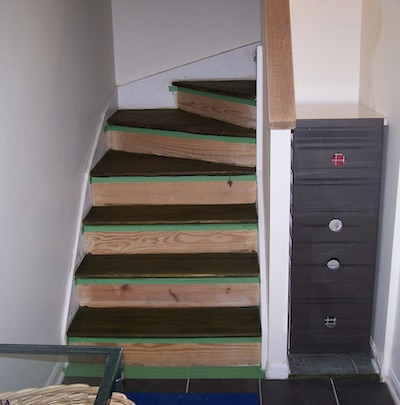
I stained every few treads, leaving some without, so I could access all floors. After they dried overnight, I came back and stained the remaining treads. Another night of drying and the initial coat of stain on the treads was done. Then, I applied another coat of stain in the same pattern of application over two more days.
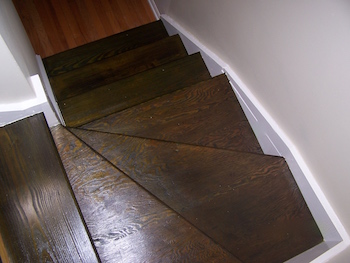
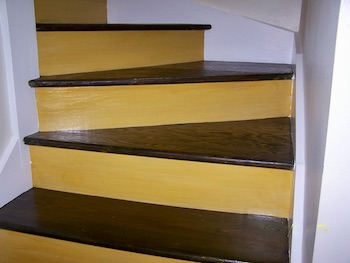
The stairs after the initial coat:
second application of dye stain on the steps.
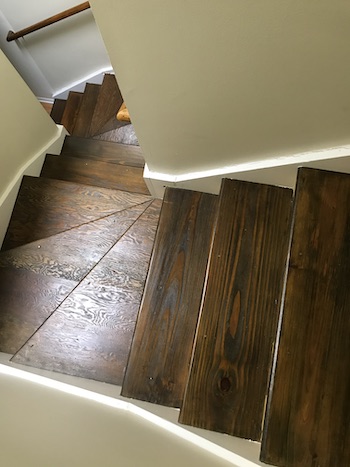
The stairs after the second, final coat of stain took on a deeper, richer look. So far, this choice seems to be the right one.
Now it’s time to address the risers.
Painting the stair risers
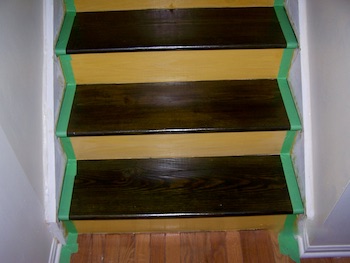
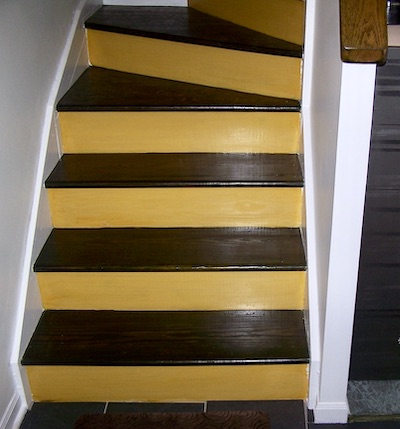
I made a blend of milk paints that looked like sunflowers.
Isn’t this ironic? I painted the walls and ceiling without covering the old carpet. This time, I covered the newly stained treads with brown paper before painting the risers.
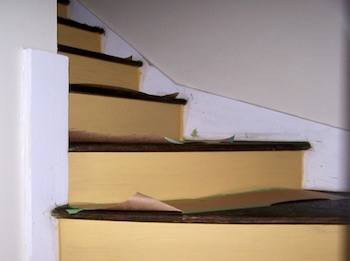
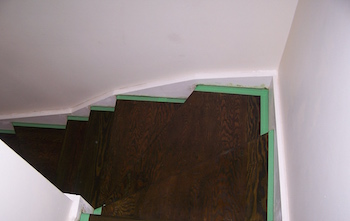
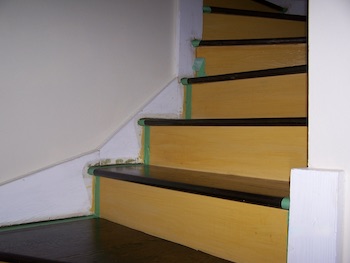
Removal of the carpet, staining the treads, and painting the risers left the stringers looking ragged. I taped the steps with green painters tape before neatening them up.
That went smoothly.
I am a fairly neat painter, so I just used the tape. Again, I took my time.
The effect that I wanted for my stairs was an organic and colorful one. I was looking for a feeling of happiness and warmth that brightened the foyer. Those feelings “blossomed” with the sunflower yellow.
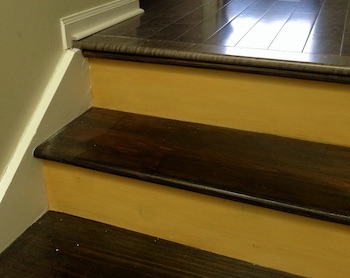
I finished the treads and risers with a satin top coat.
I couldn’t stop there, could I?
A couple of years later, I replaced the rest of the floor carpet with wood.
Next time: stair handrails and a special finishing touch!
Baadaye
Shirley J ❤️

4 thoughts on “● Finishing the Stairs”
That is beautiful, I love it
Thank you, Kelvin. I am glad that you enjoyed reading the post.
Gorgeous, Shirley! I agree with your comments about resale value. Well said. Your workmanship is something to behold.
Thank you so much, Natalie.
Comments are closed.