The lid is next on the to-do list. I began the project of the Spanish style chest in the last post – part 2.
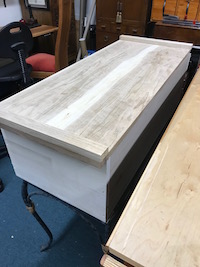
That the Spanish style chest was being made at all was somewhat of a miracle. Well, here I go. I found two boards of pecan, one 9-1/2″ wide and the other 6-1/2″, in my stash. I did not want a finished lid that was flush with the front. Granted, that would make it easier to affix the hasp, but I wanted something a little different.
As usual, I waited for ideas to emerge from the back of my mind while I worked. Later, you’ll see the solution. I had plenty of other work to do.
Preparing the lid
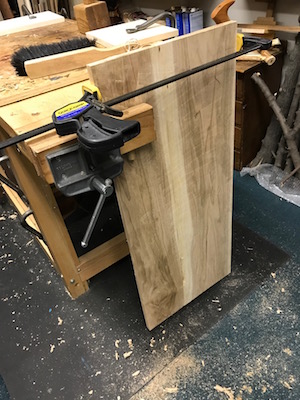
The pecan boards are set up on the bench for jointing and edge gluing. A very slight arc was planed onto each edge length to prep for a spring joint.
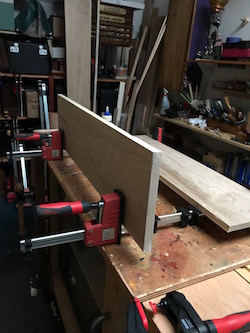
The two boards were clamped together to flatten the arc. Then they were held down with weights until the glue dried.
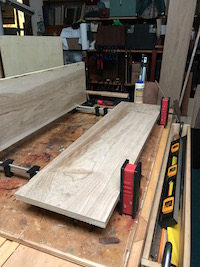
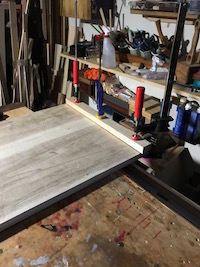
After it dried, I planed the entire panel to clean up any glue sticking out of the joint and make it as seamless as possible.

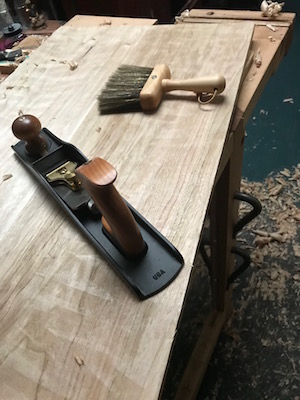
I used my low angle jack plane to get the desired flatness.
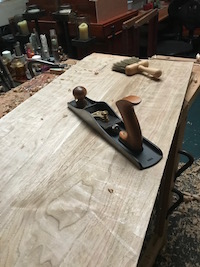
Lastly, a gentle final planing was done with the blade set at a finer setting. That’s only if needed, usually.
An unconventional thought
If truth were to be told, an even thickness on the entire working face surface edges may not be necessary. Of course, the surfaces that hold the hinges, hasp, board ends and dowel should be as flat as possible and conform to each other.
The surface area that radiates toward the center, however, may be intentionally left to be a bit rustic, not as conforming, and thus not as exactingly flat. It depends on the effect that you are trying to realize.
I meant to get a very flat top, here, so that I could use it as a working surface from time to time.
The end grain was next to be cleaned up. A little shaving with the jack plane to neaten up the edge is usually enough. I made a quick inspection of the glued joint. It was intact and tight to the very edge. Finally, the lid was checked for square.
Keeping out the dust
Dust is a problem, even in a hand tool only wood shop. Moisture in the air attaches itself to the dust on tools or other susceptible items and causes rust. I do not want that.
A dust seal can eliminate or at least reduce dust that may work its way inside the chest. It is always nice to have a place where I can store things and not worry about that. Isn’t that what closed storage is for?
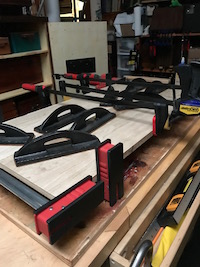
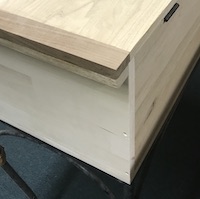
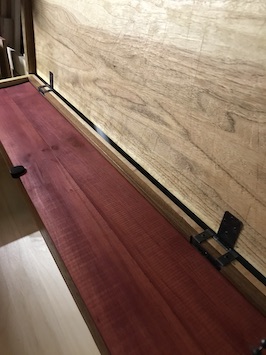
A piece of walnut, 16″ x 1-1/2″ x 3/4″ with straight grain is attached (again using glue) to each end. This created the lid overhang.
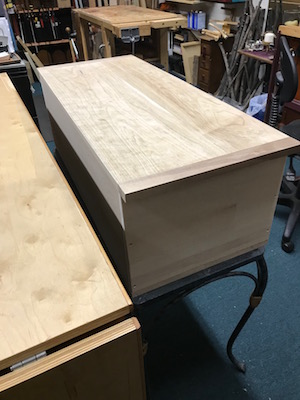
Then, a piece of maple, in the same dimensions, is attached (glued) underneath each “new” walnut end. This further stabilizes the lid and creates the left and right dust seals for the chest.
Fitting the hinges on the lid and box
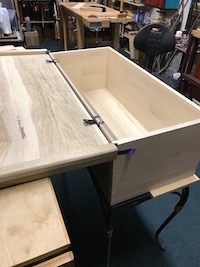
I marked off and determined the equidistant spacing of the offset lid hinges from the ends. This evenly distributes the weight of the lid and ensures that both hinges are working efficiently to open and close the lid.
If you like, you can find formulas in the back of old advanced math textbooks or woodworker’s pocket books. They help determine the spacing of hinges given the weight of the lid or door. In addition to serving as sources for hinges, manufacturers’ websites serve up guidance, too.
Moments of dread
And even after all that, sometimes I have to reset a hinge! I admit that I approach this exercise with dread. It is never truly easy for me. And each hinge type has its own features and considerations. Thus, every application and approach is different.
I actually reserve time to determine the relationship between the hinges and the receiving surface. Eventually, I make what I think is an appropriate match.
I do not forget that the lid must be kept square to the box. Well, that is the intended goal.
On some projects, I save this part until the next morning so that it is the first task I tackle. By then I am well rested and have a clear head.
And I always believe that there is nothing that cannot be fixed.
Offset hinges were set in the 3/8″ maple back augmented by a 1/2″ x 2″ backer strip of walnut. Glued together, the now 7/8″ wide back edge provides room to fit the 3/4″ hinges after a bit of shallow mortising.
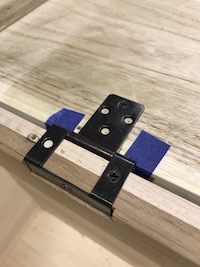
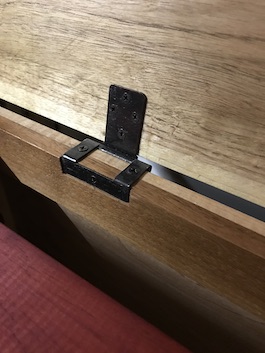
with a bit of mortising into the walnut backer strip.
A step closer
Each of these small steps has gotten me closer to the end of this project. I am still having fun.
The little things? The little moments? They aren’t little. – Jon Kabat-Zinn
—-
This is the end of part 3 of a 4 part series.
Up next: Finishing the Chest – part 4.
💚S
